Chat
Chat


People choose event ID card printers (also called badge printers) that can produce oversized IDs for a lot of reasons.
- With the larger surface area, they can more prominently display sponsors or brand design. They can even provide revenue.
- Oversized IDs can be a take home souvenir.
- Different sized credentials can identify a season ticket holder or staff.
You need the best plan and card printers for your particular needs. Easy Badges provides you with the tools to have great event IDs, including oversize cards. That does not just mean the cards and the right printer (large format or standard CR80 “credit card sized”).
We hope this article will answer a lot of your questions, but please reach out with your unique needs. Call us at (855) 436-0527 to help you choose how to print. Being successful is more than buying a printer. We are experienced in helping consider pre-printing, security, speed, and quality. It won’t stop with the purchase, either Easy Badges signature lifetime email and phone support is unique in the industry.
While most ID badge printing companies offer some limited ongoing support, Easy Badges goes above and beyond the industry standard. When you buy from us you are a customer for life — we will always be there on the line.
If you are looking for a large format card printer to make badges for sporting events, conferences, festivals, or trade shows, we put this article together to help you choose the right options.
What oversized card printers are available? What is the difference between them?
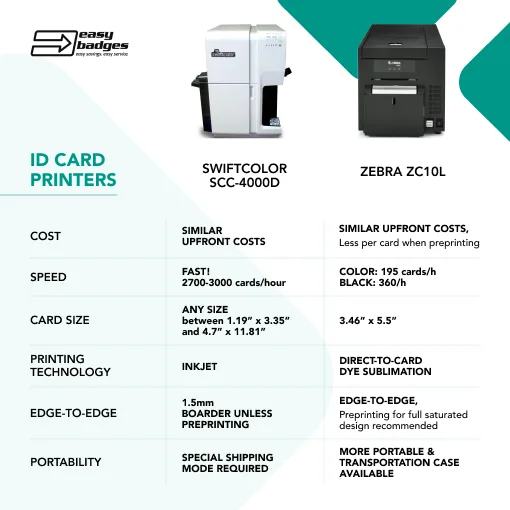
Easy Badges offers two large format ID card printers: the Zebra ZC10L and the Swiftcolor SCC-4000D. They cover the spectrum of use cases. The Swiftcolor is the reliable industry standard and the Zebra is an innovative new product. Each has advantages. We can help you choose the right event ID card printer for your program. Let’s introduce the contenders.
What are oversized ID cards? What options do I have?
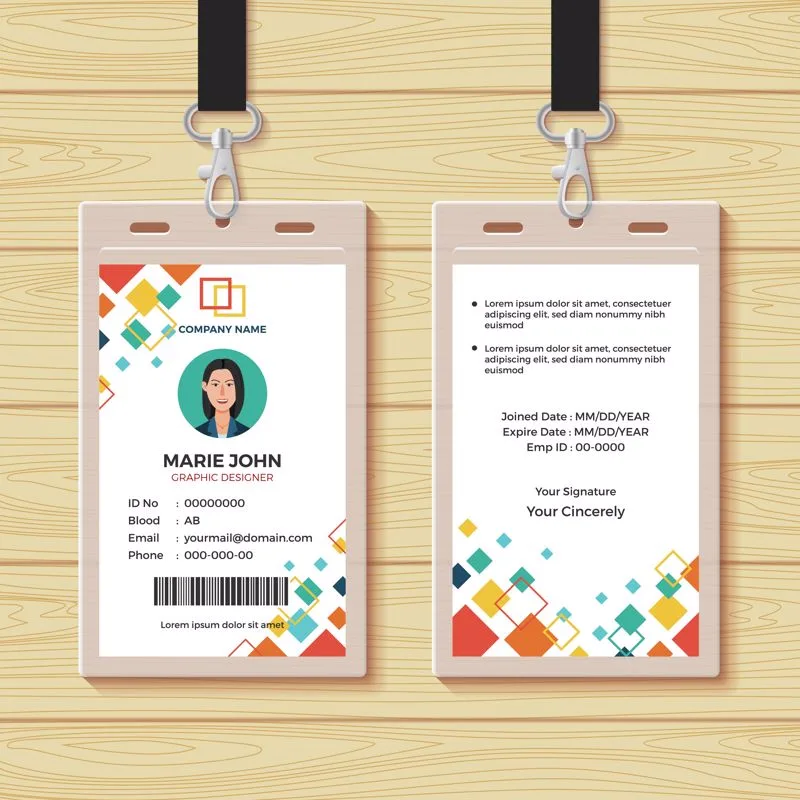
Oversized IDs are greater than the standard 3.375” x 2.125 CR80 size of a credit card. The most common oversized ID card is 3.5” x 5.5” which makes for almost three times the surface area for design.
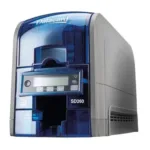
If you want to print different sizes, the Swiftcolor SCC-4000D can print on a variety of cards from 3.35” x 1.9” to a massive 4.7” x 11.81”. The Zebra ZC10L can print that “standard oversize” card of 3.5” x 5.5”.
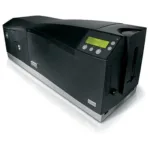
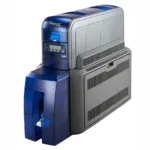
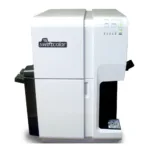
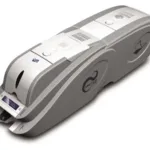
Swiftcolor SCC-4000D: The reliable oversized card printer
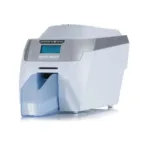
Easy Badges has carried the Swiftcolor SCC-4000D for a long time and has happily supported it for many clients. When we go to conferences or events we see a lot of badges that came out of Swiftcolor printers we support. It is fast, prints a high-quality image on the ID card, and can be used to print on a variety of sizes.
The Swiftcolor is an inkjet style printer that can print 1800 badges in an hour using the single pass process. That is a whole lot of badges, which is very useful if you have thousands of fans coming through the gates!
As with most inkjet printers, there are a couple of drawbacks. First, it does not do true edge to edge printing. Look carefully and you will see a very small white border on the ID cards it produces. Secondly, the printing can have small flaws in it, often from the rollers contacting the surface before the ink is dry. For most, the issue is too subtle to be noticed. From a distance, the cards look great. Finally, the ink will only work with card blanks that are “inkjet receptive material” so make sure the cards are compatible before buying a year’s supply.
The Swiftcolor large format badge printer is also big and heavy, weighing in at 55 pounds and two feet tall.
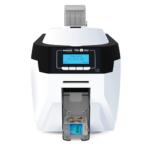
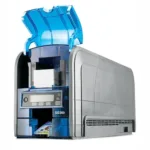
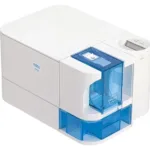
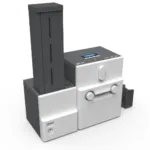
Zebra ZC10L: A new take on oversized cards with an edge to edge print
Zebra’s ZC10L is a different take on the large format ID printer. It uses a couple of unique tricks to provide advantages: true edge to edge printing and portability.
The Zebra ZC10L is a direct-to-card printer. In printing, a transfer ribbon lays between the card and a thermal printhead. The heat of the printhead transfers color to the card. This results in a very high quality print.
To achieve edge to edge printing, the Zebra has another step in producing the cards; after they have been printed, the printer trims the edges. It uses the proprietary Zebra card blank style, so like the Swiftcolor you need to make sure your card blanks work with your Badge printer.
The Zebra ZC10L is a better choice if you need to move your printer around. At 46 pounds, it is 9 pounds lighter and more compact than the Swiftcolor. Zebra offers a secure carrying case for the ZC10L.
Quick note: Windows only
In case you are a committed Apple or Linux user, it is important to note that both of these printers have only Microsoft Windows drivers. Plan accordingly!
Comparing the Swiftcolor SCC-4000D and the Zebra ZC10L
Cost
Customers have two concerns about the cost of large format ID printing — or any ID card printers they reach out to us about. The upfront cost and the cost per card. The cost of these two printers is roughly the same, so the upfront cost is very similar no matter which option you select.
Cost per card depends on your particular project! Contact us and together we can determine the best printer and supplies for your needs.
Talk to an Easy Badges Representative
Cost per card depends on the project. Among other factors, volume affects the overall cost per card; the more you are printing the less each card costs. For color, the Swiftcolor is cheaper (1.90 for the Zebra) at 5,000 cards. However, if you can pre-print and then print just monochrome, the Zebra is less than half the cost per card (2.00 for the Swiftcolor). See the section below: Pre-printing is your best friend!
Cost per card of oversized ID printing: Comparing the Swiftcolor SCC-4000D and the Zebra ZC10L
| Swiftcolor SCC-4000D | Zebra ZC10L | |
|---|---|---|
| Ink cost | Ink cartridge: ~ $600 | YMCKO Ribbon ~ $500 / Black only $280 |
| Prints per cartridge/ribbon | Depending on the design you can get up to 5,000 3.5” X 5.5” cards printed with one set | 400 prints color, 2,000 black, regardless of design |
| Cost per color card @ 5,000 | $1.27 | $1.90 |
| Cost per pre-printed monochrome card @ 5,000 | $2.00 | $0.81 |
Comparing the speed of the Swiftcolor SCC-4000D and the Zebra ZC10L
If speed is your number one concern, there is really no comparison. The Swiftcolor prints 1800 cards per hour and the Zebra prints 195 per hour (400 in monochrome black).
Portability
The Zebra ZC10L is a much better option for applications that require the printer to be moved frequently. Not only is it smaller and lighter, but Easy Badges offers a sturdy custom travel case.
If you need to move or ship the Swiftcolor, we always recommend that users save the shipping box and custom-cut foam. Special shipping mode setting required as well
Print quality
It is important to not just look for a larger DPI (dots per inch) number when comparing print quality. While the specified DPI for the two printers are different, the overall quality is quite similar. The Swiftcolor inkjet process can handle fully saturated color quite well. Zebra’s true edge-to-edge printing does deliver a nice sense of quality, but note that a saturated design may have a occasional blemishes.
Flexibility
The Swiftcolor printer can be an all-in-one solution for some customers. It prints on cards varying from 3.35” x 1.9” to 4.7” x 11.81”. It can also print on a variety of thicknesses, from 8-30 mil.
The Zebra ZC10L is kind of a one trick pony (Can we say “one trick zebra?”). It can only print the “standard oversize” card size 3.5” x 5.5”. It only accepts 24 mil thick cards.
Can either large format badge printer do dual sided printing?
Both of these printers can print on both sides of the cards, but they are not automatic dual sided printers. The operator has to manually flip the card. This can be time consuming if printing a lot of cards or printing on demand for customers.
However, if one side of a card does not have any customized information, it is easy to pre-print that side in advance. That will reduce cost and speed up printing of the ID cards.
Pre-printing is your best friend.
When we talk with people about their ID card printing needs, we often find that pre-printing dramatically reduces costs, effort, and time for their projects. It can be a game changer.
If sections of a card are going to be unchanged, Easy Badges can print batches of cards in advance for you. These pre-printed cards generally cost less than if you print them yourself, look great, and will speed up your own printing process — particularly if you are preparing for on-demand printing such as the first day of school or a conference.
Consult with Easy Badges to design your pre-print and print process.
Purchasing cards and ink for oversized ID card printers
Each of these printers require specific card blanks. Because of the unique cutting process, the Zebra ID card printer requires the special cards designed for that printer. Note that the ribbon is expended at the same rate, no matter the density of design on a card. It is a good idea to purchase the cards and ribbons together.
The Swiftcolor requires a particular inkjet-friendly PVC card for the ink to absorb. Just like your paper inkjet printer, the cartridges run out based on usage. If your team colors are blue and purple, you might go through a lot of cyan ink. You can buy the black, yellow, magenta, and cyan cartridges separately.
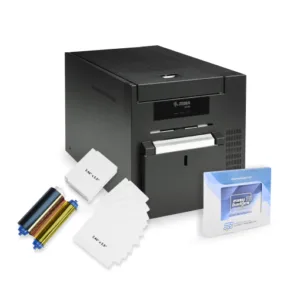
Supply costs
- Zebra print ribbon
- Zebra cards
- Swiftcolor inkjet cartridges
- Swiftcolor compatible PVC cards
Software
We are really proud of our Easy Badges software, and our customers love it. If you need to make oversized IDs with either the Swiftcolor or the Zebra large format ID printers, Easy Badges ID card software can easily be your go to.
Designing large ID cards is no different than standard sizes. The software has default standard oversized templates. If needed, you can create a custom-sized template.
Download and try Easy Badges ID Card Software
Security
There are a lot of ways to provide security and authenticity validation on cards. Easy Badges can help.
No matter which printer you choose, we can provide preprinted or blank cards with security features such as embedded hot stamped foils, holographic backgrounds, UHF, or NFC chips.
If you are using Mifare or a similar technology, the Swiftcolor allows for stock thick enough to employ the proper chips. The 24 mil Zebra ZC10L cards can not. Some NFC chips are also not compatible with the thinner ZC10L cards. Please reach out to find out more!
The Swiftcolor size flexibility is also a useful security feature. How is that security? Size of the badge is visually obvious. Often events will change card size day after day to eliminate counterfeiting. The wrong sized card stands out in a crowd!
Your next step in oversized ID card printing
We really hope that this article has been useful in your decision making. However it also points out that each application has its own unique needs. Now that you understand the key points of these two options, we hope that you reach out so we can together devise the best strategy for your needs. Easy Badges representatives are experienced and committed to configuring the printer, supplies, security, preprinting, and process for each client.
We back that up as well: Easy Badges customers have lifetime unlimited support for setup and configuration. We are ready for their call, and we are ready for yours!
Across manufacturers, across all models, there are a lot of features to sift through before you can buy the ID card printer that produces the ID badges your organization needs: double sided capabilities, direct-to-card vs retransfer, lamination, and more.
We want to help you cover all the bases, so we boiled the decision down to only 8 keys that really matter. Here are simple cues that can give you clarity and confidence that you chose the right ID printer.
If you would prefer, feel free to pick up the phone and give us a call or send us a message! We know it is important to get this purchase right, and we are happy to help with your decision-making.
1: Choose the type of ID printer based quality needs.
ID badge printers use a variety of proven technologies to get the job done. We want to provide you clarity to your buying decision, so let’s look at these technologies and when they make sense.
There are two technologies used for printing ID badges: direct-to-card and retransfer.
Cost difference between re-transfer and direct-to-card printing
Retransfer costs more, both for the machines and per print. Retransfer badge printers are generally $1,200 to $1,600 more than DTC printers. In addition, the printing film and non-PVC card increases the cost per print by between five and 20 cents each
Direct-to-card: fast and pretty good looking
Direct-to-card, is the most common choice and used by over 90% of all organizations. It uses heat to transfer color directly into the card from the color ribbon in the badge printer.
Direct-to-card printing is faster than retransfer printing, but is slightly lower quality. In particular, solid blocks of color can be a problem. Like your home inkjet printer, DTC can be inconsistent when saturating large areas. We don’t want you to get the idea that the printing of a DTC printer is terrible; You can still reliably print photos, good looking color or black and white logos, and text. See an example in the comparison chart.
DTC badge card printers do not print to the exact edge of the card. The printer leaves a small 1/8” border. On most cards, this edge is very hard to see from even a short distance.
![]()
Retransfer ID printing: edge-to-edge and really high quality
Reverse transfer, often shortened to Retransfer, printing is a two step process. First, the image is printed on the inside of a film, backwards. Then that film is adhered to the card.
Although a little more complex, retransfer has some advantages. The image quality is stunning, and those solid printed blocks that can show flaws in the DTC process will come out better.
Because of the complexity, retransfer badge printers are slower than direct-to-card and more expensive. In addition, the best practice is to use a composite card blank made of PVC and Polyester material to prevent card warping and bending during the high heat process of retransfer badge printing. Although slower, large volume organizations sometimes choose retransfer because it is more reliable. The DTC process can result in a tearing of the film, which scraps that card and requires a reprint. The retransfer process will hum along with far fewer errors that slow down the work.
Reverse transfer ID badge printers
2: Single Sided vs Dual Sided ID printing
Cost difference for dual sided printing over single sided
Dual sided printing adds between $300–400 to the cost of a comparable printer.
If you design cards that have printing on both sides but you only purchase a single sided ID printer, you CAN manually flip them over and print on the other side. It is a time consuming process that requires care. Any oil and dust on your fingers will create blemishes. You will need to be careful to orient the cards properly. If you have hundreds of cards to print, this approach would take a lot of time, but some organizations do make it work. If all the content on one side is non-variable (doesn’t change) , one could print that side all at one time, then be ready to do the personalized print of the other side as needed.
if you need to print a unique barcode on one side of the card, its best to purchase a dual sided badge printer in order to produce a sizable barcode that will be easily read by the barcode scanner without too much effort. Dual sided printers have a flipper mechanism that turns the card over and re-inserts it to print the other side without slow, error-prone human intervention.
Upgrading to dual sided printing down the road
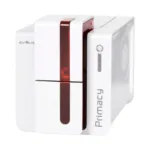
If you think a single sided printer may be enough now but think you may want to print dual sided in the future, there is good news. Many models of printers can be easily upgraded later to add dual sided functionality. It generally just requires a quick firmware upgrade or key that can be purchased for close to the original $300-$400 price difference. Current printers capable of this include the Evolis Primacy 2, Magicard 300,Magicard 600, and the Fargo DTC4500e.
3: You probably don’t need lamination
Unless you are printing cards expected to last a few years or in harsh environments.
It used to be expected that ID lamination was a necessary step to protect cards from wear and tear, but modern cards will likely last for many years using just the protective overlay panel or film in DTC and retransfer printing. They even have built in UV protection.
However, for extremely long life (10 years or more) lamination will do wonders. Most universities laminate their cards so that a student’s ID will last four years without fading. Hospitals or facilities using a lot of industrial cleaners will generally laminate.
An ID Printer that can laminate is about $2,000 more expensive than a comparable printer without lamination capabilities. Another option is ID badge holders.
4: Know your encoding: barcodes, door access, magnetic stripes
Barcode printing
Some facilities use barcodes, either the classic 1D barcode of vertical lines or the QR Code, to embed and read information. It is a good idea to consider if this is a requirement when choosing an ID card printer system Dual sided printers are recommended for printing barcodes to allow for a sizable, high-contrast barcode that will be quickly read by the barcode scanner. Easy Badges Beginner software includes the ability to create the common 1D barcodes and Easy Badges Standard edition adds the ability to print QR Codes.
Barcode-enabled ID card printers
The key to barcode printing is really the software; Easy Badges ID card software ( free download) can be your source for using barcodes in your ID card system.
Printing on Door Access and Proximity Cards
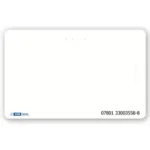
If your cards are proximity cards used with card readers for door access, that is an important consideration for printing. You need to consider the most cost effective way to have visual customization. In some cases, you can print directly onto those cards. Most door cards including HID proximity and HID iClass come preprogrammed already and no encoder is required. You simply print on the cards and enroll the card numbers as usual into your door access system.
If your current door cards (usually HID or iClass) are smooth and glossy on both sides, they are likely printable with any ID system. If one side of the card is more matte with a flat side and one side with a more rough, bumpy material, then you are likely using clamshell cards. Clamshell cards are less expensive but not directly printable with ANY card printer.
The solution for customizing clamshell cards is to print on an adhesive backed PVC card then stick that to the clamshell card.
Whether or not you are using clamshell cards, the adhesive backed cards are a great option for higher turnover facilities or cost-conscious organizations; you can pull the adhesive card off the clamshell card and reissue the more expensive proximity card. Note that the quality of print will not be as good as using a directly printable door access card. You can easily switch or use both solutions at the same facility, even using the same ID printer system.
Easy Badges is an authorized provider of HID door access cards and We also have our own brand of proximity cards, EZ Proximity, that will save you time and money.
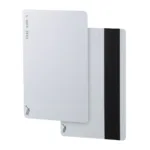
Magnetic stripe printing
Some printers can have the optional add-on of a magnetic stripe encoder, like the old-school credit cards before chip readers. If that is part of your requirements, confirm that the printer you are considering has that capability. Most of the time, this feature can not be bought as an upgrade and needs to be specified with the purchase of the printer. If you know or think you will be using magnetic stripes in the future, buy a printer with the capability at the outset! One exception is the Evolis Primacy 2. It can be upgraded to support magnetic strips after purchase.
Some magnetic stripe-capable ID badge printer models
Be sure you buy the blank cards with the magnetic stripe also! Easy Badges beginner includes the ability to program the magnetic stripe information on any ID printers that include the encoder capability.
5: There are many ways to secure your cards from counterfeiting.
For ID cards that need to be protected against counterfeits and tampering, there are several solutions to choose from.
Most people are aware of holograms. It is actually a pretty involved option that is hard to do on a small scale. The hologram is on a laminate, so you need a printer capable of applying the laminate. The custom laminate with the hologram requires an origination fee of $2,500 and a minimum order of 50 rolls of the custom laminate. It is the sort of investment that keeps most non-governmental clients from employing holograms.
Easy Badges can offer a better option for most organizations!
Some printers have custom secure watermark capabilities like Magicard’s Holokote. They can be printed using the printer’s existing ink ribbon overlay panel. The one time setup is only $600 per design and there is no additional cost per card.
Talk to us about other options! We can embed protections into the PVC cards themselves including hotstamps, foils, microtext, and ghost images.
6: Software is key to ID badge printing
Good ID software allows anyone to make professional quality badges. It also assures that authorized users are in control of badge creation. Ideally, it is a comprehensive solution that your team can quickly adopt and make use of.
Easy Badges ID Card Software covers all those bases. We have editions suitable for every organization, and we provide phone and email support forever. You can download it for free and give it a try! Beginner Edition is included with all of our ID systems and has enough features for over 95% of organizations.
The application needs to fit your data sources. If you are getting information from your custom HR software or student body database, the printing software needs to be able to connect easily and reliably. Easy Badges ID card software has the capability and we will help configure it for you for free!
Communicating with outside databases like HR software, Excel, or student systems.
Sourcing and printing information from another source like the HR database, a spreadsheet, or a student database does not depend on the type of printer. This connection happens with the ID software, not the printer hardware. The connections can easily be made with the right version of our Easy Badges ID Card software. Our Beginner version includes an internal database option, while the Standard version can connect to Excel to import cardholder information. There is a version of Easy Badges to connect to almost every database type including MySQL, Access, and an ODBC connection. Best yet, we are happy to set these connections up before purchase so you are ready to go.
Easy Badges ID card design software capabilities
- Use Included ID badge templates
- Enroll Card Holders
- Capture Images
- Versions to connect to Excel, SQL, and other outside databases
- Design & Print Barcodes
- Encode Magnetic Strips
- Manage Records
- Print ID Badges
7: Know how many cards you are printing to choose the right printer. How many at one time? How many throughout the year?
Print speed helps when you need to print a large number of badges at one time. The need for speed is not to take your ID badge printer to the drag strip (unless there is some badge printing event that we don’t know about). It is driven by the number of badges one needs to print. For instance, they One example is a school, which likely needs to print a large amount of badges at the beginning of each school year. Speed becomes really valuable. As a guideline, if you are printing less than 1,000 cards a year, speed probably is not that important a consideration.
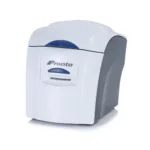
On the Easy Badges website, we provide a measure of how many badges per year a printer is good for. For instance, we recommend the Cardholdir ID Badge Printer for printing 250 or less cards per year, the Magicard 600 for up to 30,000, and the Evolis Primacy 2 for 30,000 a year or more. We made these volume recommendations based on a mix of printer features including warranty, print speed, and durability, but they are not based on a hard and fast rule..
Direct-to-card printing is faster, with the Primacy 2 printing a card every 18 seconds. However with speed comes risk. The DTC printers have a risk of tearing the film when doing large batches, particularly if there are highly saturated areas on the print job. Correcting these sorts of problems will slow down the whole process, so many large volume organizations use a faster retransfer printer such as the Fargo HDP6600.
How about we preprint for you?
To speed up printing and provide a really high quality card, Easy Badges can preprint large volumes of cards with the static, unchanging design elements. Then you can print the customized parts like name and photo as needed.
8: You need backup: support and warranties
Badge printing becomes mission critical and if you are stuck, it can be a real pain. If you buy equipment from Easy Badges, you get a lifetime free phone and email support forever. That means training new users, helping with troubleshooting, and making upgrades. Even before you purchase equipment, we will help you setup your software and configure your systems with remote sessions.
We hope that all this information is helpful to you. We work every day with people just like you who need to create cards to provide security and capability to their organizations. Choosing a printer is just a part of that effort. Easy Badges builds its reputation on setting people up for long term success with their badges. We can help you, too! Reach out and start the conversation any time!
Latest Cardholdir ID Solid 210 Printer Drivers (Released February 5, 2023):
If you’re looking for the right door access card or fob for your business, you’ve come to the right place. In this article we will explain the types of access control cards and how to identify HID® card types and programming information for re-ordering correctly. In addition to that we will briefly cover the basics of door access control systems and how access cards and fobs work.
How to Tell What Kind of Door Access Card I Need
There is a lot of information surrounding these cards, but if you need to order the right card, here is the information you need to know:
- Technology: What card reader technology is in use? The most common are HID iClass ® and HID Proximity. In this article we will show you how to identify the technology so you can order the correct cards or fobs.
- Programming: You need to know the format, facility code, and starting card number you want to order. It is important to understand that the cards are almost always preprogrammed before delivery. The cards get “enrolled” into the card reader system and allowed access. Essentially this is giving permission for that card number to work in your access system and assigning that card to an employee. iClass® cards also offer the ability to store additional information separate from the access programming, but the access programming is still fixed on the iClass® cards before delivery in most cases.
- Construction or form factor: The most commonly ordered credential types are printable cards, clamshell cards, and fobs. However, there are a variety of form factors available.
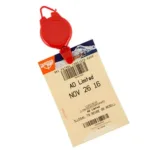
Option 1- The Label on the Last Box of HID Cards
If you have the box containing the last ordered cards, you can likely determine the technology and programming from the label. The label below clearly identifies the essential information that you will need to order more door access cards and enroll them in your access control system.
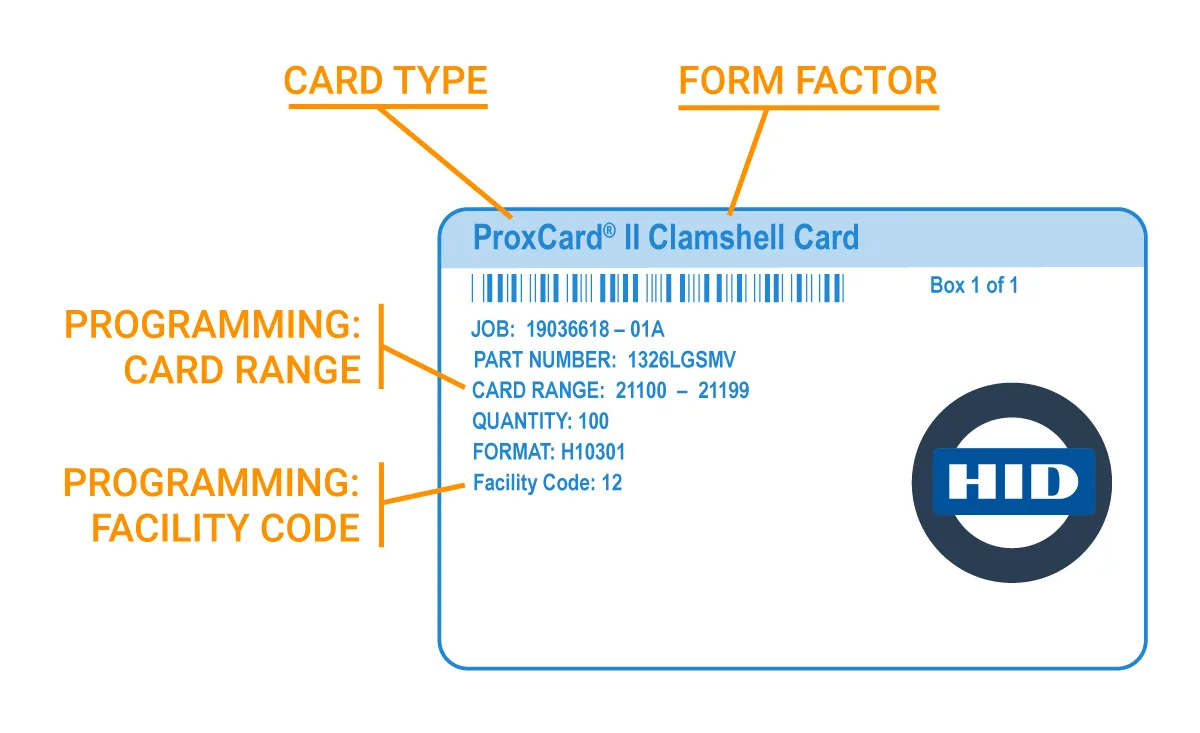
Card type and form factor – “PROXCARD II® Clamshell Card” The PART NUMBER is also listed here which is even more specific. If you have that part number, provide is to our sales team for the best pricing. The 1326 portion means it is the clamshell (non-printable) version of card. Each letter in LGSMV is referred to as the card configuration. The card configuration dictates the physical characteristics of the card, not the programming. For example, with or without a slot punch. The “V” indicates a vertical slot punch in the above example. The HID Ordering Guide is available on our product pages with full options listed.
Programming – “Format, “facility code”, and “card range.” You will likely want to keep the format and facility code the same while making sure not to order a duplicate card number. That way each card number can be assigned to a different person within the system. Cards cannot be reprogrammed so no returns are allowed by HID.
Option 2- Use the Information Written on Existing Cards
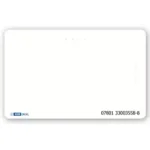
You may not be fortunate enough to have that label. But looking at the existing cards can still tell you a lot, but not everything. HID cards have a series of letters and numbers on them in the corners. We will start with the writing on the lefthand side. i.e.
Looking up what you can see on your card is a great way to determine if your card is proximity technology or a high frequency card like iClass. If you see anything like 0009P, 0006L, or 0007d, you know that you need a printable proximity card. iClass cards will always have the iClass logo, same for iClass SE or iClass SEOS.
The right-hand side of the card will have two sets of numbers next to each other if its an HID card. The first set of numbers is the card number. That won’t tell us if this was the last card number ordered though (remember you need to avoid ordering duplicates) and it won’t tell us which card numbers are enrolled in your system already. It also does not tell us anything about the facility code or the most important piece of info, the format. BUT, by giving Easy Badges the 2nd set of numbers, the ones next to the card number, we can look up your previous order information and review that with you. You will still be responsible for not ordering a duplicate number, but this is a great start!
Option 3 – Easy Badges Will Mail You a Sample
Reach out to our sales team and we can send you a free test card with the most commonly accepted card format, the 26 bit format with a random facility code and card number. If you think you may need a different format or specific programming, just let us know and we are happy to provide a sample card with your choice of format, facility code, and card number.
Option 4 – You Mail Easy Badges a Working Card
Easy Badges can read your current card’s info and review with you. Contact sales.
Option 5 – Access the card Reader System
You can also log in to the card reader system. There are many different access control systems, so it is difficult to provide clear guidance as to how you can identify the card type and programming needed, but please reach out with any questions!
How do HID® Cards Work?
HID® cards are preprogrammed by the vendor – such as HID or Easy Badges – with unchangeable information: the format, facility code and card number. When it is time to provide a card to a user, the administrator enters the card number into the door access control system. The cards will not work until enrolled. Then particular zones or doors are enabled for the user, either one at a time or by joining the user to a group with particular access.
- Format: H10301 (also called 26-bit Weigand format) is most common but Easy Badges has a wide range of formats available. Different access control systems accept various formats. I once read a good piece of content on explaining what a format truly is and how it works- If I provide you with a random 10 digit number such as 8554360527 and didn’t tell you anything further about the number, it would be meaningless. But if I also told you that the number is a phone number, then you would know the first 3 numbers were the area code, the next 3 numbers were the prefix, and the last 4 numbers were the line number. (855) 436-0527. You can think of a card format in the same way, different formats have the card number, facility code, and other info in different places.
- Facility Code or a Site Code: A number between 0 and 255. Some systems don’t use this, but this is still be programmed onto the card for most formats. Facility codes slightly increase card security and can also be used to group together employees with similar permissions in larger organizations. For example, tech’s have access to the front door and server room while standard employees only have front door access.
- Card Range: It’s important to not order duplicate card numbers of numbers that are already enrolled and assigned in your access control system.
Types of HID® Cards. And what does HID Stand for on These Cards, Anyway?
HID® stands for Hughes Identification Device, a secure access system and identity company headquartered in Austin, Texas. If you find that your cards are HID®, you will have to determine what type of HID® card they are. There are two main HID® Proximity card types: smart cards, also known as iClass®, and proximity cards (Proxy or Prox cards or Prox II).
What is a Proximity Card?
More than likely your system uses proximity technology, generally known as Prox or Prox II, cards. Proximity card readers, also based on an HID® technology, have been reliably managing door access in businesses around the world for many years.
Unlike iClass® cards, proximity technology is not patented. Because this technology is based on an open standard, Easy Badges can offer equivalent cards that save money and cut down on shipping times. It’s easy to think of proxy cards as passwords written down on digital paper and the scanner as door attendants being the only ones capable of reading the password. Proximity access cards don’t have the additional memory and encryption of iClass® cards (or fobs or clamshells). Easy Badges has Proximity cards and fobs in stock: we keep companies supplied with Proximity technology in any form factor.
How to Identify the Type of Prox
If you see any of the following printed on the card, then it is an HID® Proximity card:
Note that these are just a few examples of printed text that would designate a card as an HID® Proximity card. For more help, don’t hesitate to contact Easy Badges.
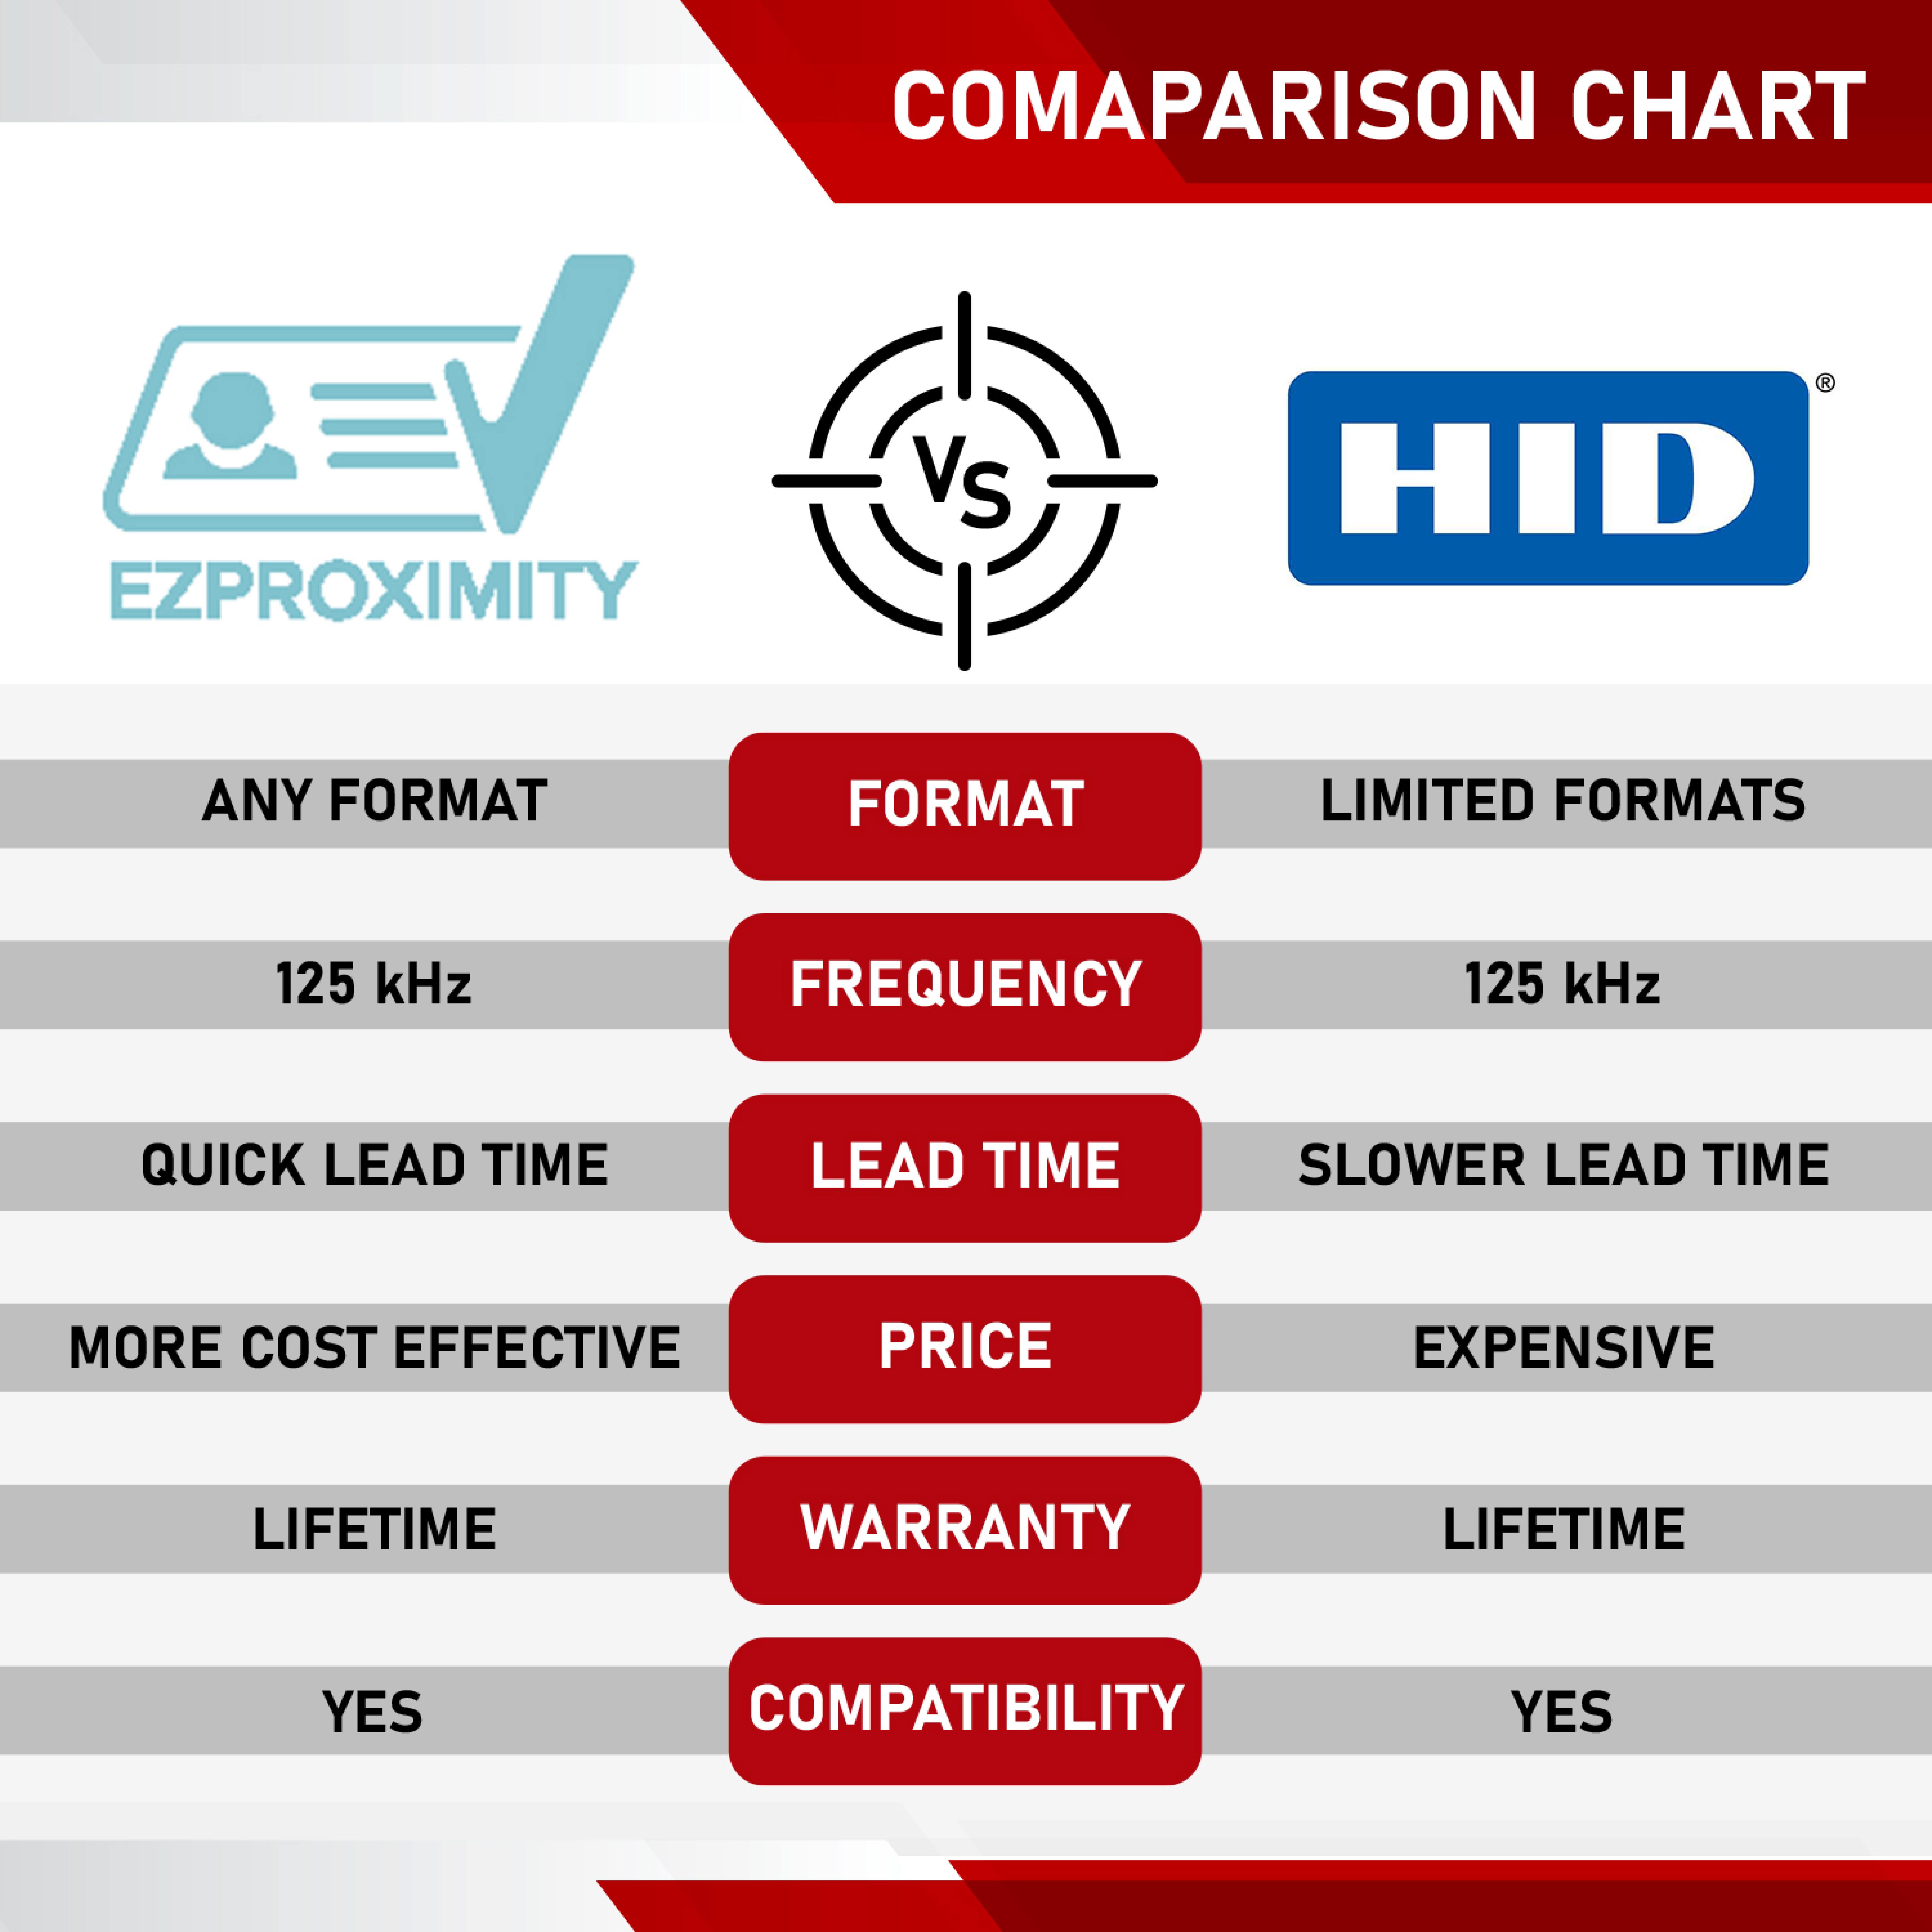
HID® Proximity vs EZproximity: Cost and Availability
What is HID® iClass®?
iClass® cards, a type of HID smart cards, use a unique iClass® technology that reads and writes information using radio frequencies. The technology is patented by HID® and can only be manufactured and programmed by them.
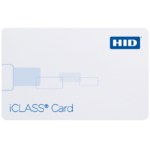
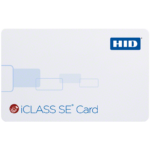
Distinctive from proximity cards, iClass® cards can store additional information. They can be used for many things (even payments!) depending on the iClass® product being used. These cards may have “HID® iClass® dl” or “HID® iClass® dp” printed on the card. There are 3 main types of IClass® technology used today. The first generation is simply called iClass®. It was followed by iClass® SE and iClass® SEOS®.
Identifying Different iClass® Cards
If it’s an…
- ICLASS® card, there will be an HID® logo with “ICLASS®” printed or engraved in the bottom corner of the card
- ICLASS SE® Card, it will have one of the following written or engraved on the bottom corner of the card: HID ICLASS dl or HID ICLASS dp
- ICLASS SEOS® card, it will have HID SEOS written, printed or engraved on the card

Types of HID® Cards – Cards vs. Fobs
You will very likely see “HID” printed on the cards your company is already using. That does not necessarily mean you have to buy expensive and hard-to-get HID® cards for the system! Read on.
The first step is understanding what style of cards you currently have and the options for new ones. While there are thousands of access control systems out there, most of them use one of two card technologies, proximity and iClass®.
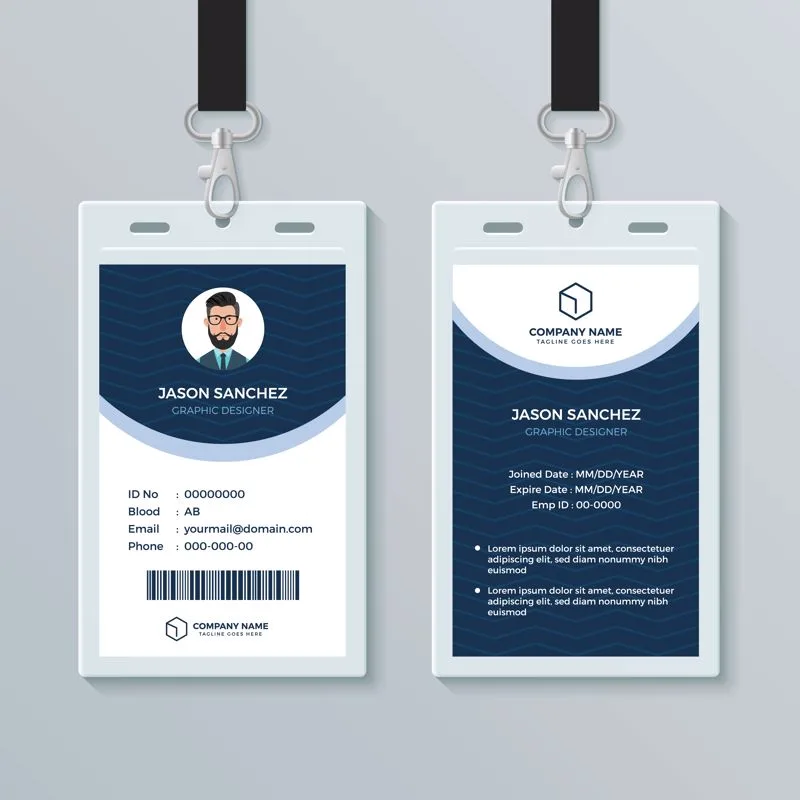
Printable Door Access Cards
Printable cards are placed in a machine that can print information or identification photos onto them. They sometimes have a magnetic strip on the back or a proximity chip that a scanner can read. Printable cards are standard CR80 30 mil cards. They can be printed with any ID card Printer system.
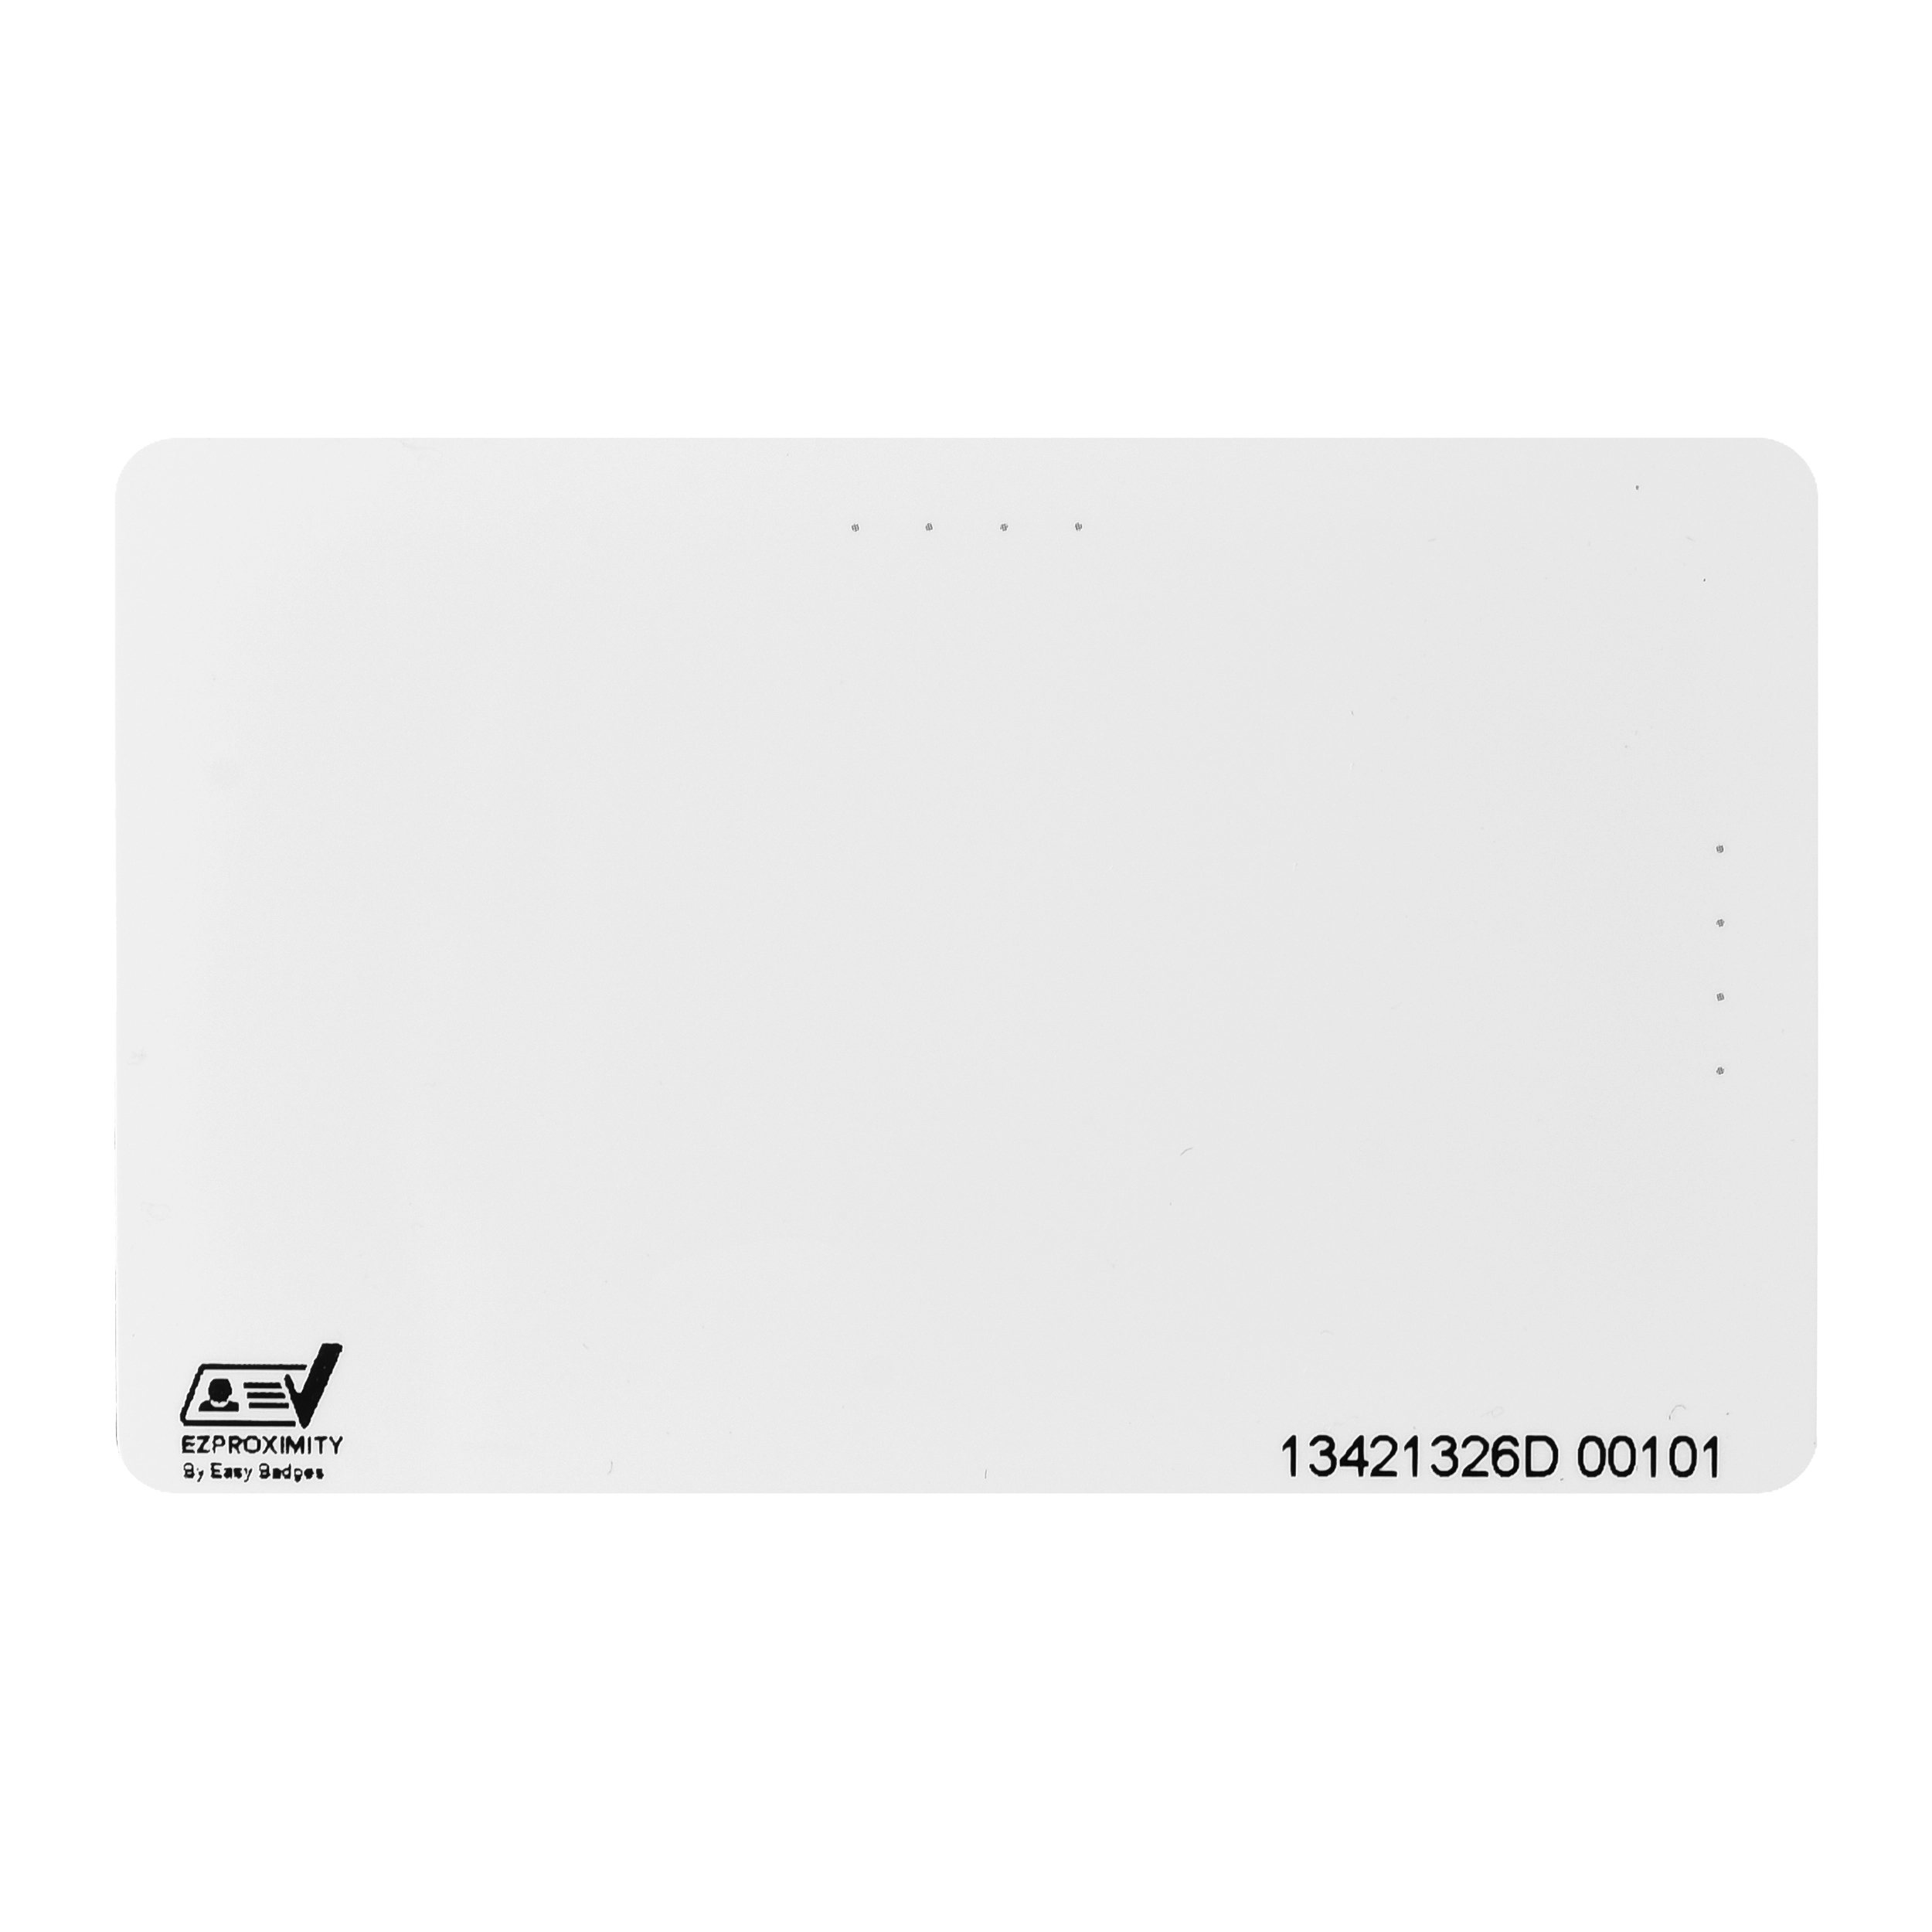
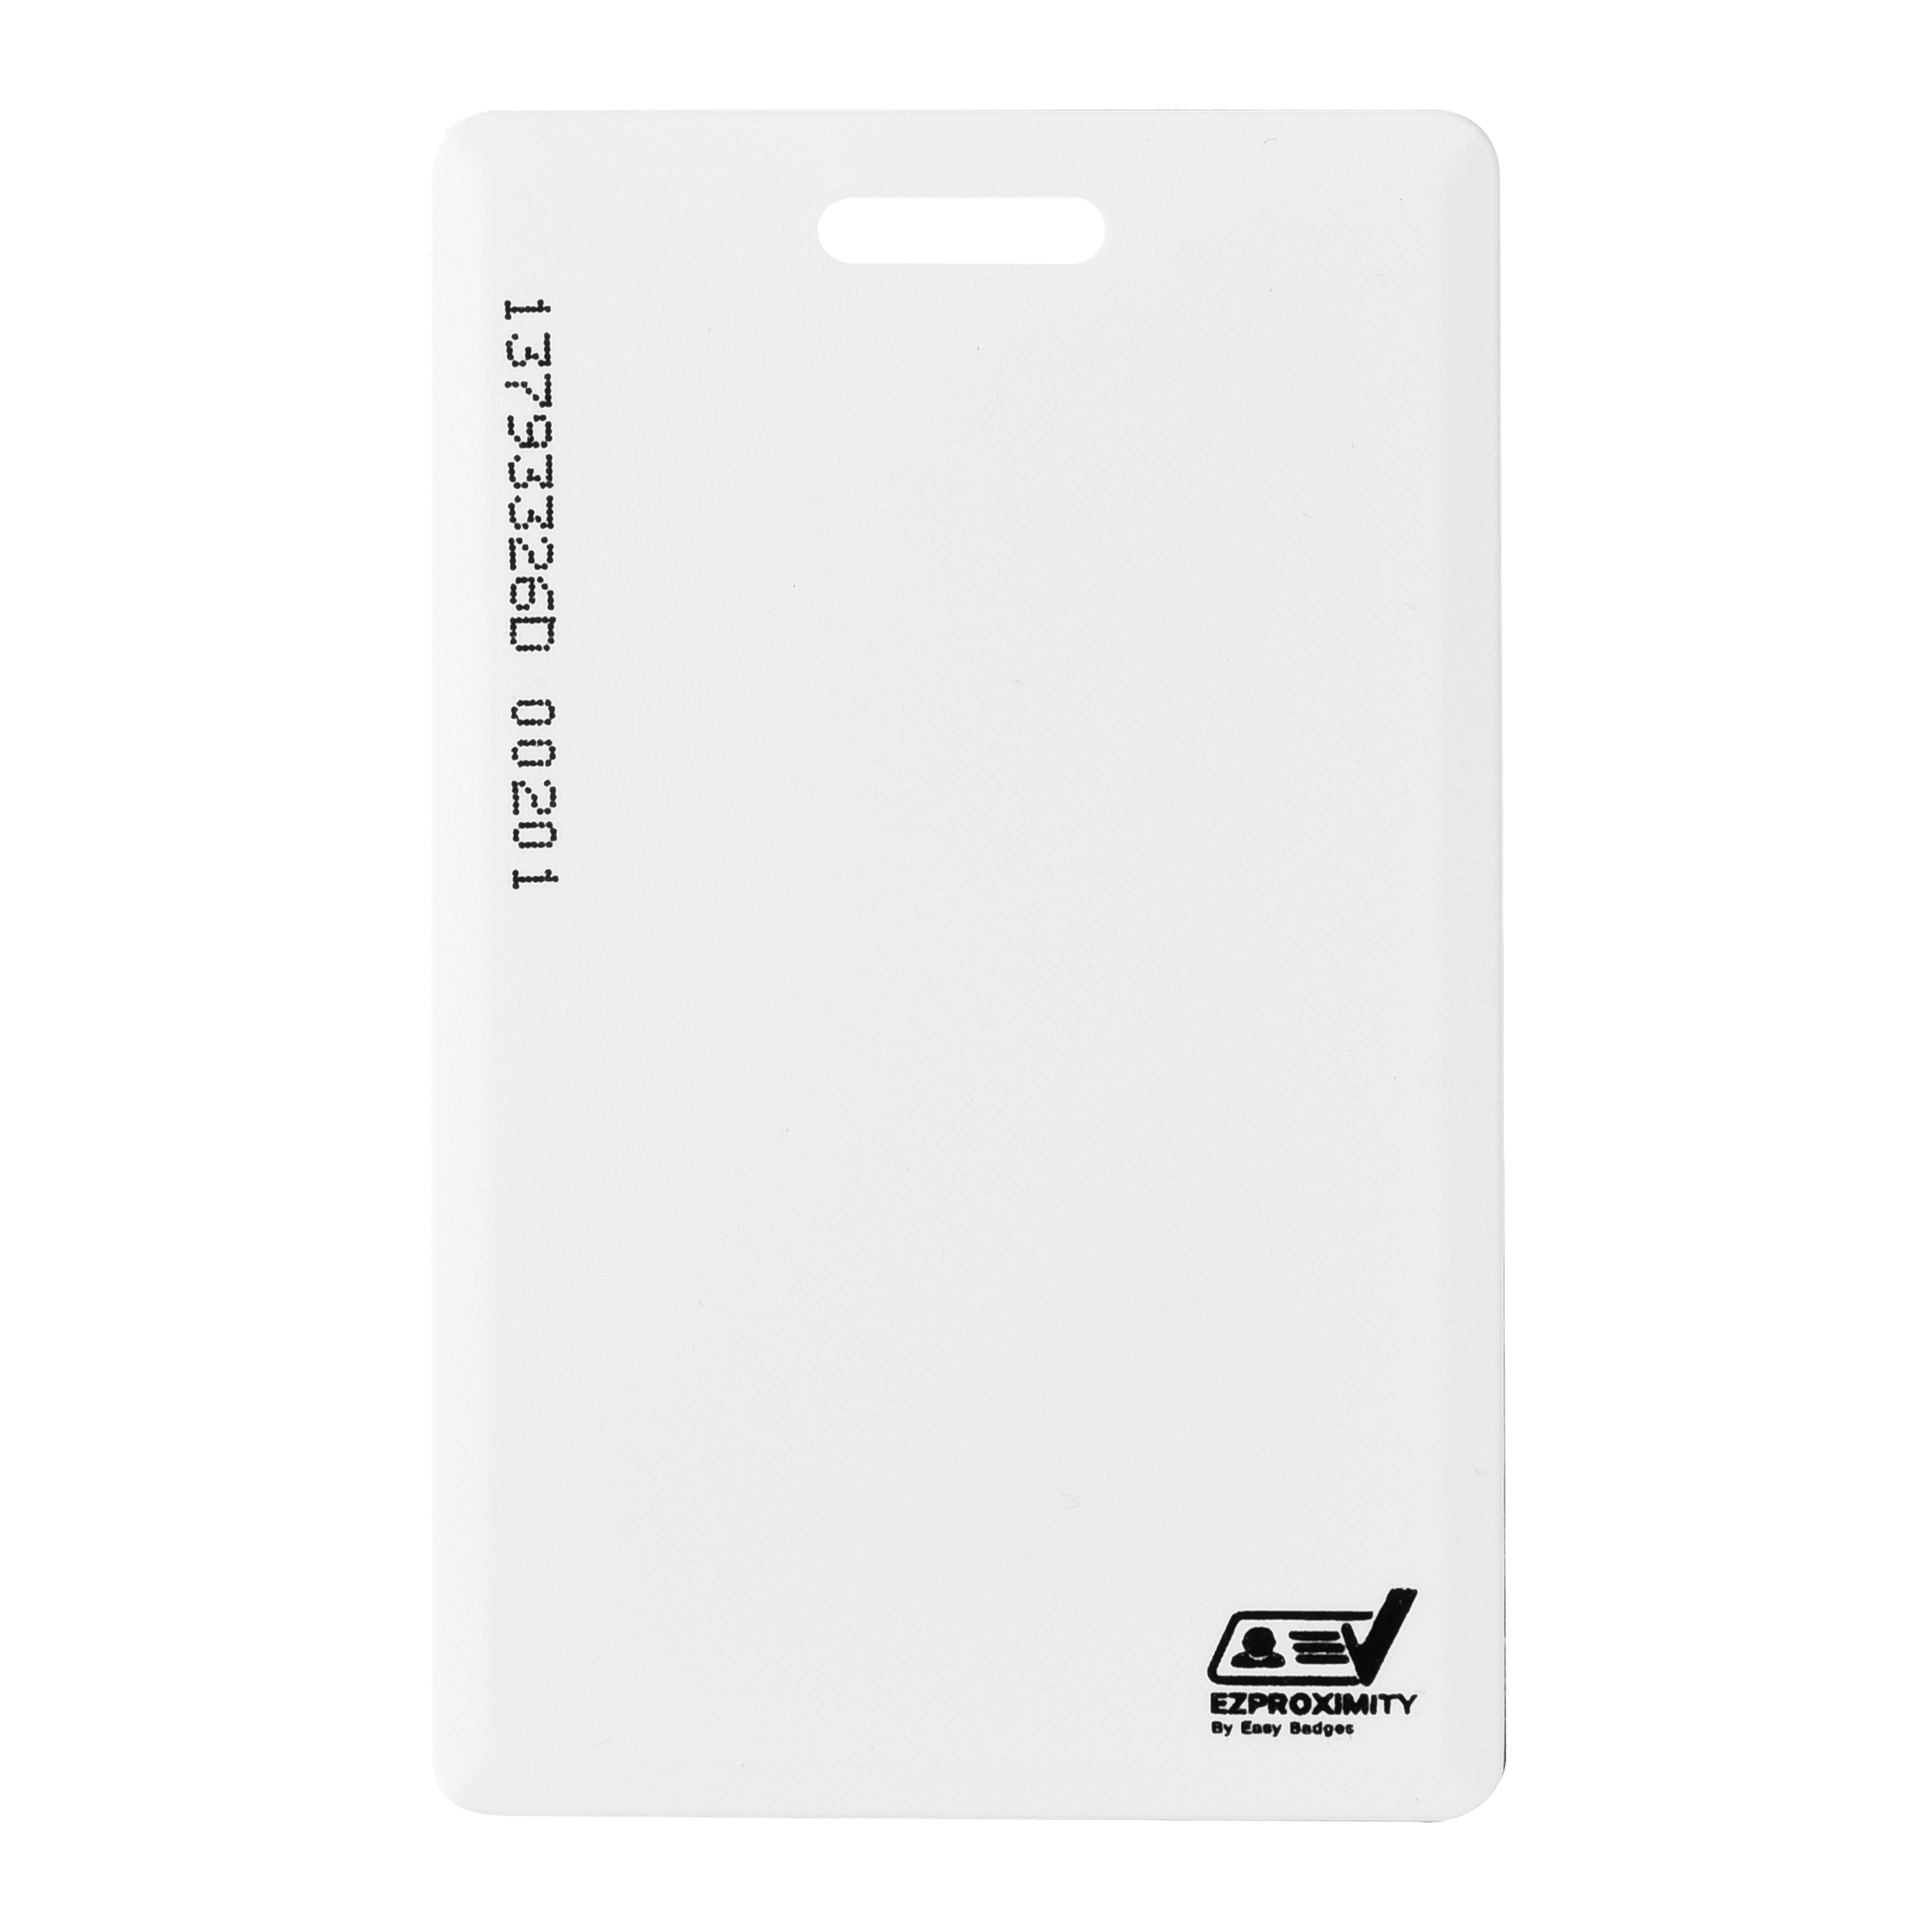
1386LGGMNis the most commonly ordered HID® printable proximity card. The Easy Badges house brand is affordable, reliable, and ready to ship.
EZProximity Printable Proximity Cards.
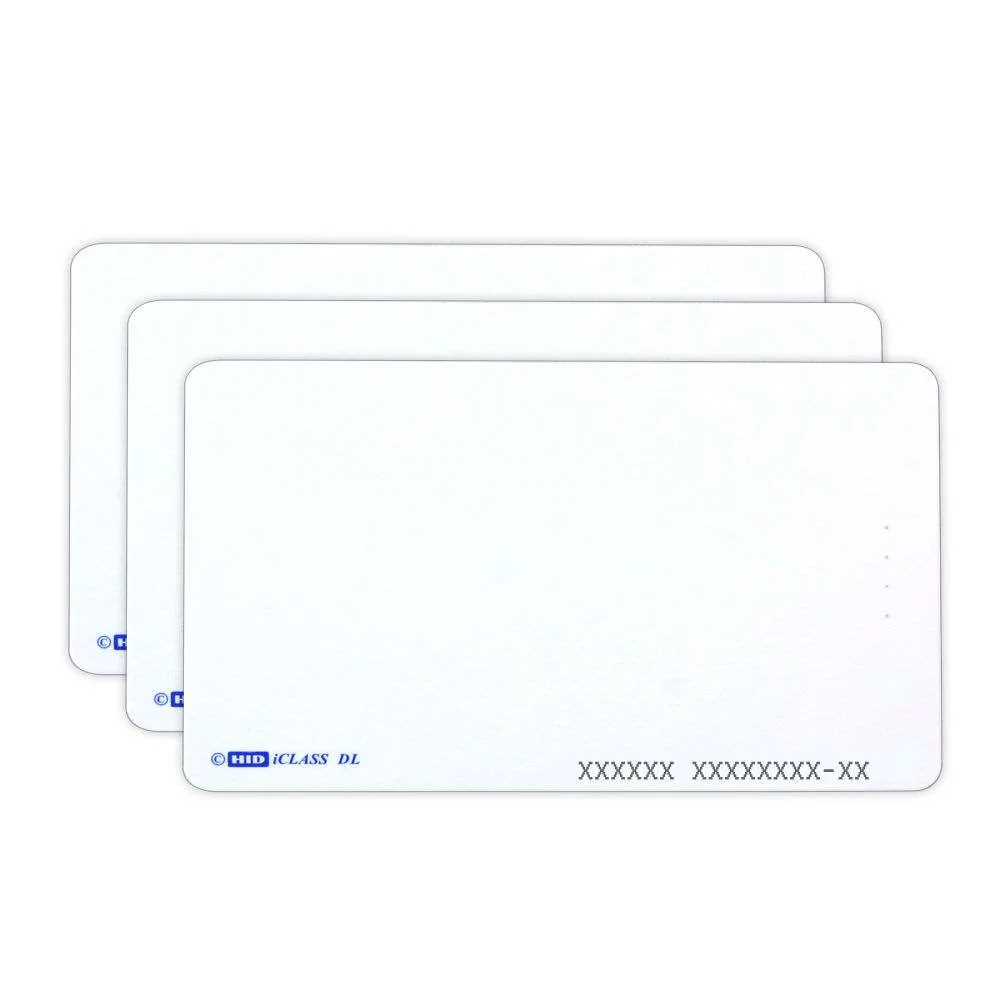
2000PGGMNis the most commonly ordered iClass® printable card.
What is a Clamshell Card? Am I Using one?
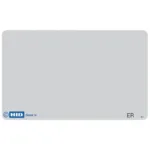
Non-printable clamshell cards are noticeably thicker cards made of two pieces of plastic that protect the inner components. They lack a magnetic strip and are only read through a proximity sensor.
1326 Proxcard ll is the most commonly ordered HID® Prox clamshell card. The Easy Badges clamshell prox card is ready to program and ship!
2080PGSMVis the most commonly ordered iClass® clamshell card.
What is a HID Key Fob? How do I get Replacements?
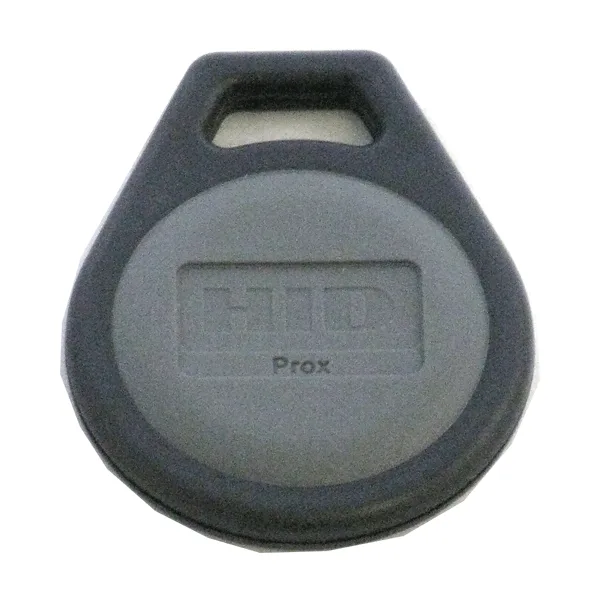
Keychain fobs have the same capabilities as door access cards in a different form factor. They also contain proximity sensors. Often, they are round or tear-drop shaped and have a hole on them that allows them to be placed on a key ring (hence the name!) or attached to a lanyard.
1346 Proxkey llI® is the most common HID® prox key fob. Check out the Easy Badges proximity key chain fob for better pricing and a faster lead time.
The most commonly used HID® iClass® fob is the 2050PNNMN IClass® ll Keyfob.
EZProximity Credential Format Guide
We have put together a quick guide of formats available to purchase. There are more formats available, contact sales.
| Format Code | Access Control Issuer | Bits | Facility Codes Available | Card Numbers Available |
|---|---|---|---|---|
| H10301 | HID | 26 | 0-255 | 0-65,535 |
| AWID | AWID | 26 | 0-255 | 0-65,535 |
| 40134 | Indala | 26 | 0-255 | 0-65,535 |
| Quadrakey | Honeywell | 32 | N/A | 0 – 4,294,967,295 |
| H10306 | 34 | 0 – 65,535 | 0 – 65,535 | |
| N1002 | Honeywell OmniProx | 34 | 0-65,535 | 0-65,535 |
| S12906 | Simplex | 36 | Default 17 | 0 – 16,777,215 |
| N901157A | Napco | 36 | 0-255 | 0 – 67,108,863 |
| A10202 | 3 | 37 | 0 – 4,095 | 0 – 524,287 |
| H10302 | HID 37 No FC | 37 | N/A | 0 – 34,359,738,367 |
| H10304 | HIF 37 No FC | 37 | 0 – 65,535 | 0 – 524,287 |
| S10401 | AMAG | 37 | Default 9 | 0 – 536,870,911 |
| H10314 | 40 | 0 – 4,095 | 0 – 65,535 | |
| K11101 | Kantech ioProx | 32 | 0-63 Fixed Field: 0-255 |
Card Range: 0 – 65,535 |
| Kantech XSF | Requires Extended Family Code & Family Code | 64 | Ext Fam Code: Must Provide | 0 – 65,535 |
How do Keycards Work?

Multiple components make up door access control systems. These include the system and software used to control the system, door readers, and credentials.
- System and software of the door access control server are the brains of the operation. These host the database of information used by the system to determine what cards belong to who and what doors they are allowed to access.
- Key cards and fobs come pre-programmed with a format, facility code, and card number. These are assigned to people within the organization who will use them when accessing the system.
- Door readers are easy to spot. They are next to (or sometimes on) doors. Once it reads the card, the door unlocks if the facility code and card number are on the “allowed” list in the door access control server.
While door access cards transmit credentials, the system and software handle the heavy lifting. When credentials are placed near a door reader, the information it transmits is sent to the system and checked against a database. If the information matches the database and its setting, the door unlocks, and the person can walk through. If the credentials do not match, or if they do not have the proper permissions listed in the system, it remains locked.
HID® iClass® readers, HID® proximity card readers, and door access control systems are typically wired into backup power or have fail safes built in so that doors will still open in case of power outages or other emergencies.
What is Mobile Access?
You may have heard about near-field communication (NFC) as well for access reader systems. NFC is integrated into mobile phones and “tap to pay” credit cards. There are so-called “mobile access” systems that use NFC, though they are not very common.
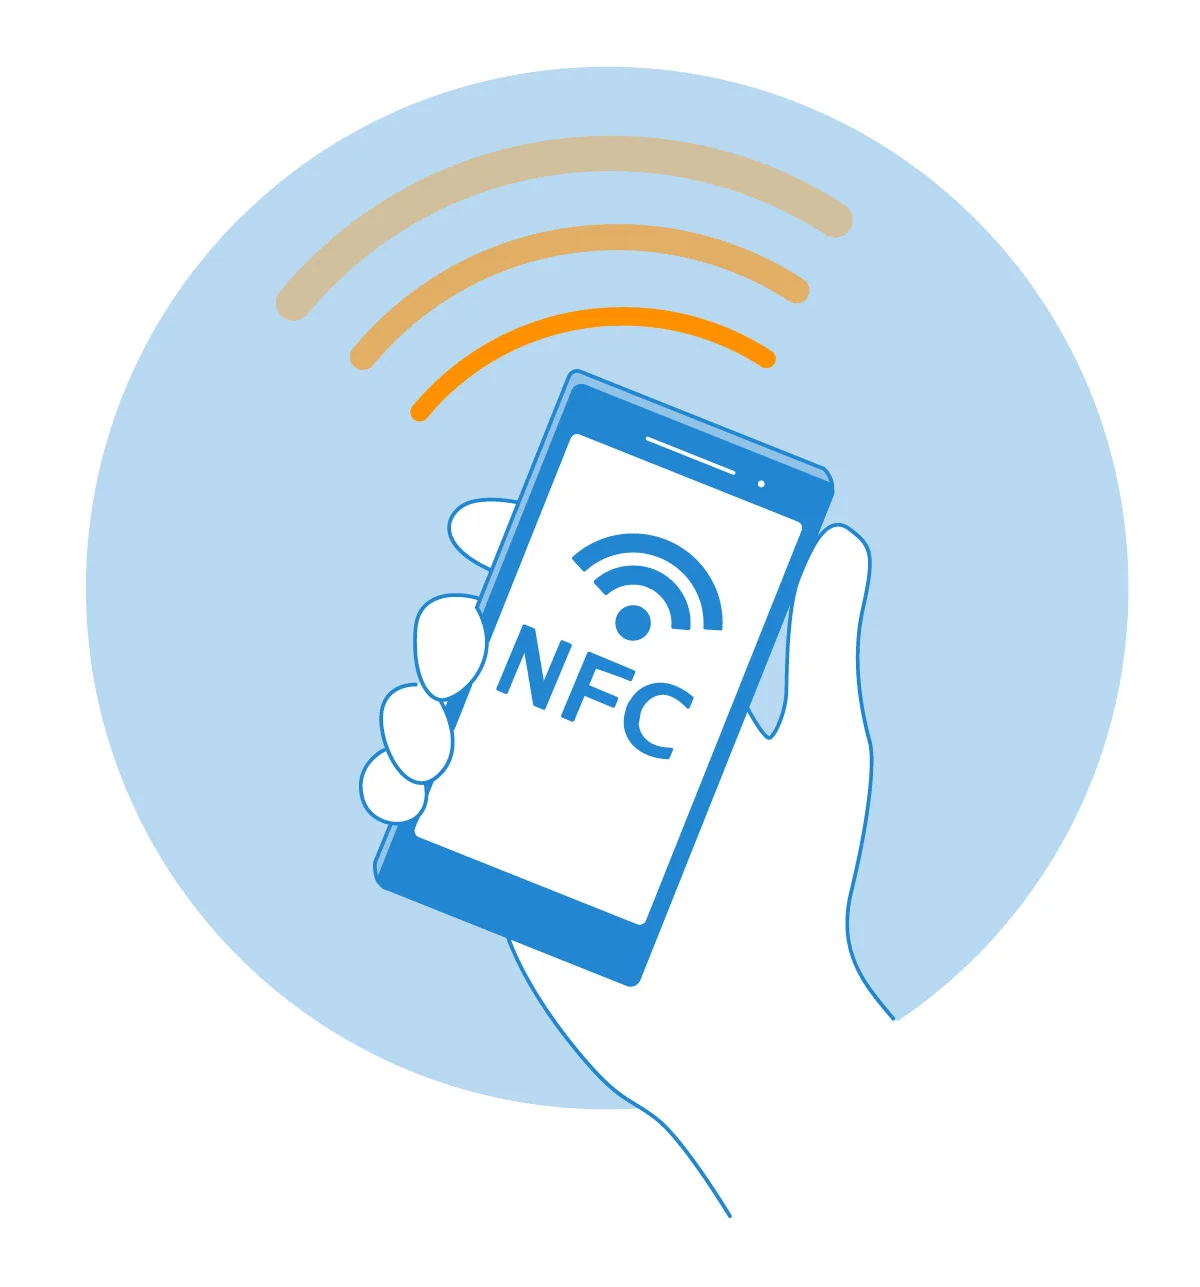
Mobile access is a newer method that allows door access systems to use things like cellphones, tablets, or even smart watches as means of entry. Most portable devices like these have NFC proximity technology built in. However, this requires special apps and systems to be set up to work.
Understanding the kind of cards you need, their specifics, and how these systems work together can feel a little overwhelming if you’re new to them. However, with the information you’ve gained here, you should be on your way to finding what you need, including how to identify the HID card type. Easy Badges offers a wide array of affordable and easy-to-source cards that work with everything described here. Please don’t hesitate to browse our selection of cards and place an order today!
Savvy managers look at their employee ID badge budget, and ask: Why can’t we print employee ID badges in-house to fit our organization’s needs? After reading this article, you’ll feel more confident about creating your own employee ID badges in-house.
Employee ID badges, made cost-effectively and your way
The cost-savings to printing badges from your desktop computer come in many ways:
- On-demand printing saves on service fees, postage or delivery costs.
- Printing badges when needed eliminates over-buying badges from an outsourced printing company.
- Using the same staff, equipment and materials helps you save when it’s time to print temporary employee ID cards, access cards for contractors or updated photo IDs.
Consider that the cost to you for an outside printer to handle your ID badge print and delivery is $6-8 per card and you can print cards on site for a fraction of that cost. The average cost with an ID badge printer system would be $0.35-0.45 per card.
So what do you need to print employee ID badges that fit your organization’s needs? An ID badge printer system that you can set up and start using simply and easily.
Easy Badges sells every top-rated ID card system for organizations of all types and sizes. ID card printer systems fit every budget from as low as $799 to over $9,000. For enterprise-level employers, there are ID badge printers like the Fargo HDP6600 printer that offer more sophisticated features and a longer warranty period. Before you buy, let’s go over the top considerations for printing ID badges on premises.
 Find an ID card printer system for your organization.
Top features of an employee ID card system to consider
You’ll want to choose the best ID card system for your organization. In order to do that, determine the look and function of your organization’s employee ID badge and then, find the ID card printer, software and materials that meet those requirements. A system that is easy to use and compatible with your computer operating system are also important considerations.
To avoid buying an employee ID badge system that is too much for your needs, consider the following:
Printing volume
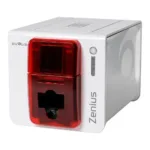
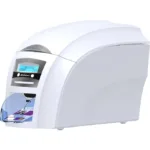
Entry-level ID badge printers can produce up to 500 ID cards a year. Models like the Evolis Zenius Classic ID Badge Printer can print 120-150 full-color cards per hour at a higher capacity. An enterprise-level capacity printer can handle 30,000 ID cards a year and produce 230 full-color cards per hour.
Single or dual sided printing
Your employee ID cards may require a barcode or magnetic strip on the backside and a photo, logo and other identifying information on the front of the card. Others only need a single-sided printer. Some models of ID printers come with an upgrade kit to convert from single to a dual-sided printing.
Full-color printing
In-house ID printers are capable of printing in black and white, monochrome and full-color. More advanced printers use the retransfer method to produce edge-to-edge, photo-quality images.
Direct-to-card printing
The direct-to-card (DTC) method of printing provides a high-quality ID badge in black-and-white or full-color in the 300 dpi range. DTC printers offer a near-to-edge finish that’s fast and fits neatly on a desk.
Retransfer printing
This technology uses a two-step process to reverse transfer an image or text edge-to-edge on the card. The photo-finish quality is ideal for vivid colors, high-definition and longer-lasting ID badges.
Photo printing
ID printers that come equipped with cameras for printing photos range in price. There are models that come with webcams compatible with Mac and PC computers.
Lamination
Lamination provides durability. Some ID card printers with lamination can print over uneven surfaces like smart cards for a longer lasting, secure employee ID badge on site.
ID card encoding
Your HR department can encode employee ID cards with barcodes and magnetic stripes on the spot. Keep your employee information secure by printing in-house.
Drivers and data security
Many ID card printer systems are compatible with your software and drivers (e.g., PC, Mac or Linux) and can be networked to print from other printers through USB, Ethernet or WiFi. For added security, ID badge printers such as the Evolis Primacy 2 Badge Printer have security upgrades available such as a locking ID card hopper and various encoding options
Card types
ID card printers can accommodate printing on large-format or oversized cards, smart cards, contactless cards and any card type (e.g., PVC, PET, polycarbonate and ABS).
Easy-to-use software
Of course, what is a printer without software? Easy Badges ID Badge software lets you create an employee ID badge design without being a graphic design expert on any of the top-rated, entry-, mid-level or enterprise-level ID card printers.
Are you ready to make your ideal employee badges in-house? Let Easy Badges help you find the best ID card printing system for your organization. Get a free trial of the Easy Badges Software. Our customers love our badge printing software’s lifetime support and training. We love to help you find the best ID badge printer system for your needs.

Are you wondering how to print ID cards for any use? The answer is simple: invest in an ID card printer system. You won’t be sorry. Consider the cost per card (CPC) by a third-party printer or by your staff:
- Third-party printing and delivery CPC: $6 to $8.
- ID Card printer system from Easy Badges CPC: $0.35 to $0.45.
Easy Badges makes ID card printing a snap for small businesses, colleges and multi-location enterprises to create custom ID badges, entry passes and security cards for any purpose. If this is your first time exploring your ID card printing options and you’re feeling a bit overwhelmed, you’re not alone. There’s more to consider than meets the eye when you’re learning how to print ID cards on-premise.
We love talking with first-time buyers about ID card design, printers, software and ID card accessories. After reading this, you’ll understand the advantages to printing your own ID badges on-site.
Benefits of an ID card printer system
An ID card printing system is a cost-effective solution for growing companies, large event or studio spaces with high numbers of short-term visitors and colleges with a new class and numbers of staff to identify. ID badge printer systems with software range from less than $1,000 and up to $10,000. We’ll cover what features you should look for in an ID badge printer below.
Perhaps your ID cards need a hologram, a QR code or artwork and you think printing it from an ID card desktop printer is too much to expect — but you’d be surprised. An ID card printer system with software that is compatible with PC and Mac operating systems can provide you with the quality and quantity of ID cards you need for any reason.
Your office manager or HR staff can update your records database and also print any type of card — photo ID, access pass, security badge — from their desk. Easy Badges software makes designing an ID card simple. With our software, you can scan images and signatures to use on predefined templates for plug and play ID card production.
What can you do with an ID card printer and software?
We’re happy to tell you that there are several options for customizing an ID card. As technology has advanced, so has printer technology and the materials involved. Here are some common purposes companies and schools want to have an ID card printer system on hand:
Membership badges
Organizations, clubs, community centers and many other types of organizations that need to print high quality, branded membership cards will enjoy an in-house ID card printer system. Gain the ability to capture signatures, add important information simply with a barcode and print out full-color designs edge-to-edge for a professional look. You can print a membership card on demand. You can update your membership card look without the back and forth involved with a third-party printer. Most importantly, your member information stays with your organization.
Access cards
For school, work or community building entry, proximity and door access ID cards provide an added measure of security that everyone appreciates. Not only can you print door access cards on-site, but the printers are more secure. Models like the Magicard 600 ID card printer shred data after they encode it onto a smart card for contactless, secure access for your warehouse staff, clinic administrators or municipal personnel.
Design and print employee badges with Easy Badges software.
Software for ID card design
If you’re not sure you want to add “proficient ID card graphic designer” to your resume, we understand. Easy Badges created an intuitive software for PC or Mac and works with every ID card printer model including Magicard, Zebra, Evolis, Nisca, Datacard and Fargo.
Easy Badges ID card design software capabilities:
- Choose from one of over 50 card design templates for your ID card.
- Create your own template and save them for future use.
- Capture and safe images and signatures.
- Design and print barcodes.
- Encode magnetic stripes or smart chips.
- Record and manage data.
ID card software needs to work with your operating system and databases. Also, updates should be free and easy to implement.
Printer system components
When you start looking into an ID card system, there are several features and components to take in. Easy Badges ID Card Printer Systems come with everything you need to design and print your ID cards right away.
Consider the following main features of a printer system:
Connectivity
Some printers connect to a PC or Mac computer by Universal Serial Bus (USB), Ethernet or WiFi. If you need a networked connection that enables multiple computers to use one machine, talk with us before you purchase a printer.
Printing Capabilities
Get the ID card printing system that will print the number of cards you need in a year. Volumes range from up to 500 to up to 30,000. Batch volumes also vary — 120 to 1,000 an hour — depending on the printing method (direct to card or retransfer) and printer technology. For more on the many different ID card printing methods, read our blog post.
Single-sided or dual-sided printing
For the best ID card, you may need an encoded barcode or magnetic strip on the back and a photo, logo or other identifying information on the front of the card. Some models of ID printers come with an upgrade kit to convert from single to a dual-sided printing. Easy Badges has just the printer for your ideal ID card.
Support
It’s important to know you can reach out for help when you need it. Our customers can rely on EasyCare Support from a friendly technician by phone or email. We offer this for the lifetime of any order free of charge.
Here are ID card printer components you’ll need to make decisions about:
ID Card type
The standard ID card is a blank EZCR8030 PVC card that’s similar in size and thickness to a credit card. Dual-sided printing using the direct-to-card method on these cards works well. However, if you choose a retransfer printer, the heat required to apply the image and then reapply to the card surface can warp the card. Additionally, if you need to print an ID card larger than the standard size, contact us for a custom quote. Our sales representatives are happy to guide you on the printing method right for you.
Ribbon
ID card printers use ribbons with color panels in yellow (Y), magenta (M), cyan (C), black (K) and O for clear overlay. You can find one-color (monochrome) ribbons too. We can help you select the right type of ribbon for your ID cards.
Camera
Of course there is no ID card without a photo. Cameras range in price by photo quality, flexibility in setup and editing features like resizing and cropping. Easy Badges can help you with an ID badge camera system (camera, software, power pack, tripod and backdrop), a basic model or top-of-the-line camera.
Lamination
Protecting ID cards that get a lot of use just makes sense. Lamination protects it from ultraviolet light and extends the life of a card four to 10 years. However, a printer which includes a laminator costs between $1,300 and $2000. Easy Badges will help you select the right printer with lamination.
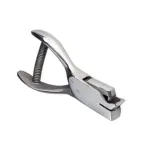
ID Card Accessories
In addition to the features of an ID card printer system and its component parts, you’re going to need accessories to complete your ID card project such as ID card holders, lanyards, and slot punches. Easy Badges even has popular cause-related badge reels to choose from.
Easy Badges Support Guarantee
All products purchased with Easy Badges receive our guarantee of lifetime support from a friendly technician by phone or email.
Easy Badges has the right ID card printer system for your budget and purpose. Call Easy Badges today.

How do I find the Facility Code for programming?
If you need to order more HID cards or need to enroll an HID card into your access control system, you may need help finding the facility code on your working cards. The Facility Code is never printed on the HID card itself. There are multiple ways to find your facility code for your HID cards.
On the Old HID box
The easiest way to find your facility code is to locate your old box of cards. This should be the most recent card order to ensure accuracy. The facility code is part of the HID card programming information and will be displayed on the label of your last box of cards as shown above.
When ordering new HID cards, you typically want to keep the facility code the same, only changing your card numbers to avoid duplicates. There are 255 possible facility codes for the standard and popular HID 26 bit card format, H10301.
In your Access Control Software
Another way to find you facility code on your HID cards is to look in your access control system. The information can be found by looking at previously enrolled cards. There are thousands of different systems, so this process will differ by organization.
Mail Easy Badges a Working Card
Easy Badges can read your current card’s info and review with you. Contact sales.
Easy Badges Will Mail You a Sample
If you aren’t sure of your card programming at all, the best way forward is for us to send you a sample card for enrollment. The free test card will have the most commonly accepted card format, the 26 bit format with a random facility code and card number. If you think you may need a different format or specific programming, just let us know and we are happy to provide a sample card with your choice of format, facility code, and card number.
What is a facility code?
A Facility Code or a Site Code: A number between 0 and 255. Some access systems don’t use this, but this is still be programmed onto the card for most formats. Facility codes slightly increase card security since it it not printed onto the card and it can also be used to group together employees with similar permissions in larger organizations. For example, engineers have access to the front door and server room while standard employees only have front door access. Or perhaps completely different buildings.
Easy Badges has added used ID card printers to their inventory. The used ID card printer inventory includes a variety of printers and capabilities including single sided, dual sided, and magnetic encoding. Some of the used card printers have over 4 years left on their manufacturer warranty and have had less than 500 cards printed on them. All of our used ID card printers come with everything you need to start printing ID cards in only a few minutes including: software, print ribbon, and blank PVC cards. All used card printers have been tested and are 100% in working order. Purchasing a used ID card printer can get you printing your ID cards at a cost that can fit any budget. Lifetime phone and email support from our experts is always included at no charge. Our used ID card printers come with a 14 day return policy. Choosing the right used ID card printer can be difficult, we can hep.
Video Transcription:
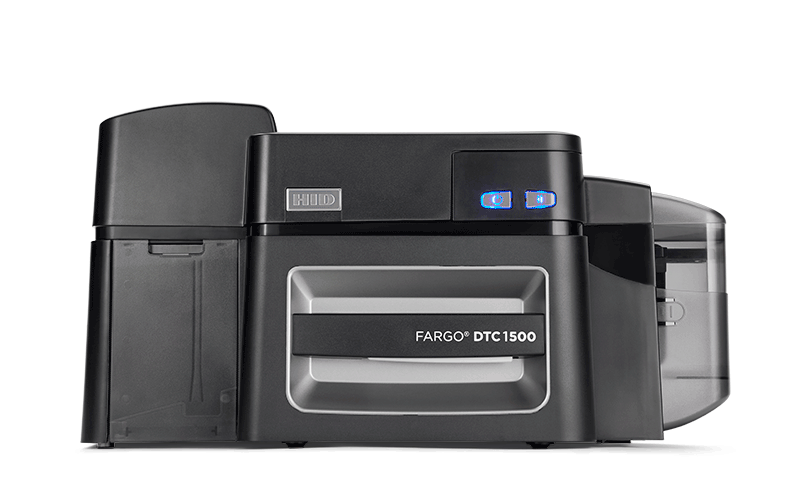
This video on the Fargo DTC1500 printer shows you how to carry out routine cleaning. Open the input hopper and remove all the cards. Open the ribbon drawer and remove both the ribbon and the cleaning roller. Next replace the ribbon drawer. Remove the paper cover from the cleaning card. If the printer has a magnetic encoder do not remove the paper strip at the bottom of the card. Remove the protective cover from the reverse side of the card. Now place the cleaning card into the input hopper. On the PC desktop click start, click devices and printers. Right click on the DTC1500 printer icon. Select printing preferences. On the printing preferences dialog click toolbox. Select the clean printer tab. Now click the clean button which is located at the bottom of the dialog. The cleaning card will be fed into the printer and the cleaning the card path rollers will begin. When cleaning is completed the card will be ejected into the output hopper. Regular cleaning is recommended to ensure consistent print quality. Now reload the cards and ribbons into the printer. To see more technical videos please visit our HID Global channel on YouTube.
Video Transcription:
This video on the Fargo DTC1500 printer will show you how to install OMNIKEY contactless encoder. Disconnect the power and USB cables. Put the printer onto the front to remove the two screws that secure the top cover. Return the printer to an upright position and then remove the top cover by starting at the edge of the back of the printer. Remove this screw from the main board. Remove the USB connection jumper as shown. Install the USB board that came with the upgrade kit. Secure the board with long screw that came with the upgrade kit. Tilt the power button housing forward to unsnap from the bottom and remove. The contactless encoder will be installed in the right hand bay behind the power button. Tilt and slide the encoder into the bay until it makes solid contact. Root the wires under the frame as shown. Connect the wires to the USB board. Replace the button housing by inserting the bottom tabs first and then pressing down on the top. Replace the top cover. Tilt the printer onto its front and the secure the top cover by using the two screws previously removed. The contactless encoder upgrade is now complete. To see more technical videos please visit HID Global channel on YouTube.
Video Transcription:
This video on the DTC1500 printer will you show you how to install a magnetic encoder. Disconnect the power and USB cables. Flip the printer onto its front. Use a torque T10 screwdriver to remove these two screws. Return the printer to an upright position, now remove the top cover by lifting these two tabs. Once the cover is removed both the printer and the flipper are exposed. Remove the card path tab which is colored white. The two tabs being pointed out on the magnetic encoder are used to ensure the correct location in the printer by sliding along these two groves. Slide the encoder along the groves as shown. Make sure the encoder is pushed home firmly to ensure a good contact with the main board. Now the top cover can be replaced. After refitting the screws previously removed, the magnetic encoder installation procedure is complete. For more technical videos please visit our HID Global channel on YouTube.
Video Transcription:
This video on the DTC1500 Printer will you show how to load consumables. Remove the ribbon from its plastic cover. Open the printer ribbon drawer. Lift the cleaning roller tray. Install the ribbon supply and take up spools as shown. The supply spool is colored orange and the take up spool blue. Next lower the cleaning roller tray and place the cleaning roller on to it. Remember to remove the protective paper cover from the cleaning roller. Replace the ribbon drawer. Open the card input hopper door, Load the blank cards in to the input hopper after lowering the card tray. For more technical videos please visit HID Global channel on YouTube.
Video Transcription:
This video on the Fargo DTC1500 printer will show you how to replace the print head. Disconnect the printer power and USB cables. Tilt the printer onto its back. Remove the adhesive tape from the print head cover. Use a flat head screwdriver to lift the cover. Pull these two tabs inwards and pull upwards to loosen the print head. Unlock the print head by moving the white push rod to the right. The print head assembly can now be pulled upwards and out. Hold the print head mount and rotate the print head away from you to release it. Remove the torque screw to release the ground cable. Remove the cable connector while being careful not to damage the pins. Connect the wires to the new print head. Make a note of the print head resistance value. Reconnect the ground cable with the torque screw that was previously removed. Now clip the print head back on the mount. Insert the print head mount assembly into the printer. Verify that the white push rod is on the right side of the tab. Replace the print head cover. Now click start on your PC, select devices and printers. Right click on the DTC1500 card printer icon, select printing preferences. Click the toolbox button. Select the advanced settings tab. Update the head resistance setting with the value recorded earlier from the new print head, click apply. Click OK. Once more click OK. To see more technical videos please visit our HID Global channel on YouTube.
Video Transcription:
This video on the FARGO DTC1500 demonstrates on how to add a lamination module to the printer. This field upgrade should only be carried out by an HID trained technician. Using a torque T10 screwdriver remove these two screws on the back of the printer. Remove the top cover by pushing inwards on these two tabs. Remove this screw which attaches the top of the flipper module to the printer. Now turn the printer over to remove these two screws attaching the bottom of the flipper module to the printer. Pry the tabs away from the base of the printer. Disconnect the flipper from the main circuit board. Insert the hopper cover that came with the lamination kit. Now remove the tab from the lamination module top cover. Now the top cover itself can be removed. Open the laminator door so the back panel can be removed. Line up the laminator with the printer and slide them together. Make sure the bottom tabs are secured and there is no gaps between the laminator and the printer. Secure the Laminator by securing the two screws previously removed from the bottom of the printer. Open the laminator side door and attach the connector to the printers main circuit board. Replace the laminator side cover as shown. Replace the top cover. For more technical videos please visit our HID Global channel on YouTube.
Video Transcription:
This video on the DTC1500 will show you how to set up your card printer. First off open the printer box. Remove the insert tray and packing. Remove the printer from its plastic cover. The following items should be in the printer box. The printer power supply, European and US power cables, a USB cable, a yellow notice card and a print test card. Connect the power supply to the printer. After connecting the power supply to the main switch on the printer using the front button. Open the print ribbon drawer. Lift the cleaning roller tray. Remove the ribbon from its packaging and insert the supply and take out spools as shown. place the new cleaning roller onto the tray. Be sure to remove the protective paper cover from the cleaning roller. Replace the ribbon drawer. Load some blank cards into the input hopper. Connect the USB cable to the PC. The next step is to install the DTC1500 driver. Before doing this ensure that you have administration rights for your work station. Download the printer driver to your desktop. At this stage of the driver installation you should click next. Here you should click next again. Now click to accept the license agreement. This step requires input as to how the printer is connected, we are using USB in this case. Now the driver will be installed. At this stage the USB cable should be connected to the printer. This step completes the driver installation. Click finish to close. After installing the driver ensure you have sufficient privileges to manage the printer and manage documents. Right click the printer icon, select printer properties. Select the security tab. Select your user name. Ensure these boxes are checked, if not check them and if unable to, contact your IT administrator. Test your connection by printing a test card. Click Start and then devices and printers. Right click on the DTC1500 card printer icon. Select printing preferences. Now click the test print button. A Fargo test card will be sent to the printer. The test card is now being printed. The card should look like this. For more technical videos please visit our HID global channel on YouTube.
Video Transcription:
This video demonstrates how to convert a single sided printer into a dual sided one. Click start on your PC desktop. Select devices and printers. Right click on the DTC1500 printer icon. Click printing preferences. Select the device options tab. Notice that the print both sides is grayed out. This shows that this printer is only configured for single sided printing. Select the card tab, click the toolbox button. Notice that the dual sided option is not selected. To convert a single sided DTC1500 into a dual sided one an RFID tag is required. Tear the tag along the dotted line. Fold the tag as shown. Remove the ribbon drawer, lift the cleaning roller tray and remove the ribbon. Insert the RFID tag as shown. Lower the cleaning roller tray and replace the ribbon drawer. The power button will turn purple and the pause button will turn red. The printer will perform a restart. Return to printing preferences, select the device options tab. The print both sides option is now enabled, check the box. On the card tab click toolbox. Now dual sided is also selected here. To see more technical videos please see our HID Global channel on youtube.
Magicard will be releasing more information soon on it’s newest printer, the Magicard Rio Pro 360. The 360 version of the printer will feature an additional on-board Linux CPU allowing optimum flexibility for custom projects that require SDK development. This new addition adds even more power to the proven Rio Pro workhorse ID card printer.
Choosing the Right ID Printer with Hologram Capability
Choosing the right ID printer with hologram capability is critical you’re looking to strengthen security, discourage counterfeiting and protect what matters most to your organization.
Today, security breaches and identity theft are on the rise. Businesses that want to protect themselves from information leaks and unauthorized people entering their offices, warehouses and factory floors are using custom hologram ID cards to deter theft and keep their employees safe.
The Best Defense is a Good Offense with a hologram ID printer
Information leaks, identity theft and unauthorized entry are risks that businesses like corporations, government offices and universities are confronted with daily. Theft and ID security breaches can cost businesses millions of dollars a year and can put their employees safety and personal information at risk.
Now more than ever before, it’s vital to take a proactive stance on security and invest in a quality hologram ID printer.
Generic and Custom Hologram Laminates
Nowadays, there are many generic and custom laminates that can be used to protect a hologram identification card from daily wear and tear and counterfeiting.
Before making a decision on how to protect an holographic id card, you’ll want learn more about the following types of laminates and hologram security options:
- Patch laminates for ID card printer laminators
- Thin film laminates for ID card printer laminators
- Hot stamping foils produced prior to printing
- Magicard Holokote printers
Patch Laminate Options for an ID Card Hologram Printer
Patch laminates offer highly durable protection for id card holograms. These types of laminates offer increased scratch resistance and card life. Patch laminates also make it more difficult to counterfeit or alter your organization’s id cards.
Laminate patches are available in clear and holographic materials. They can also be applied over cardstock printed with dye sublimation, resin and retransfer printing technology.
Patch laminates come in a variety of thicknesses:
- 0.5 mil (12 microns)
- 0.6 mil(15 microns)
- 1.0 mil (25 microns)
For added card life, the 1.0 mil (25 micron) patch offers an additional UV blocking layer add-on to reduce fading from exposure to direct sunlight.
Thin Film Laminates for a Security Hologram Printer
A thin film laminate is used to protect a holographic id card. This type of laminate provides an edge-to-edge thin covering that helps protect against counterfeiting and increases durability and card life. Thin film laminate comes in clear and holographic material, can be applied over card stock printed with a dye sublimation technique, resin and retransfer printing technologies.
Thin film laminates come in a variety of thicknesses:
- .75 mil (19 microns)
- 1 mil (25 microns)
When a thin film laminate is applied to a hologram id card, the thickness of the card becomes approximately .12 mils (3 microns).
Hot Stamping Foils for Hologram ID Cards
This type of laminate is applied to a hologram to give it a metallic aluminum, silver or gold look. Hot stamping foils can be applied to generic or custom holographic id cards made of PVC or other plastics, security documents, bank checks and other high-importance documents.
ID Card Printers with Laminators and Hologram Printing
- Fargo HDP5000
- IDP Smart50L
- Magicard Helix (laminator feature coming soon)
- Evolis Primacy Lamination
- Nisca PR-C151
- Fargo HDP5600
- Fargo DTC5500LMX
How to Choose Fargo Printer Generic and Custom Hologram Overlays for Your Company ID Cards
-
Choose your material:
- CR-80 Poly Guard, 0.6 mil, transfer film
- CR-80 Poly Guard, 1.0 mil
- Thermal Transfer Film
-
Choose your level of security lamination
High Security Option
Includes:
- High-resolution (1200 dpi) company logo
- A choice of 4 different Visual Security Elements (VSEs) designed into the logo’s holographic image
- Registered holographic image placement; produces a counterfeiting-reducing precise image placement on each hologram id card
Secure Option
Includes:
- Low resolution (200 dpi) company image with design review prior to manufacturing commitment
-
For High Security purchasers; select 3 visual security elements (VSEs) and image orientation:
Image Orientation Options:
- Portrait
- Landscape
Visual Security Elements (VSEs; Choose any 4)
- 2D & 3D
- Fine Line
- Flip Images
- Hidden Text*
- Micro Text*
- Morphing
- Nano Text*
- Pseudo Color
*text file required
If you’re looking for added security and protection against counterfeiting, but don’t want to spend more on custom, expensive laminate options, Magicard ID printers have a great cost-effective, built-in security feature called Holokote.
Holokote, prints a secure watermark on an id card’s surface. It is created using the same overlay panel that would support a standard ribbon or film, so it doesn’t add any additional costs unlike custom laminates.
Magicard Holokote Security Hologram Printer Options:
- Magicard Rio Pro– has built-in Holokote security technology and the option to customize the watermark for your company’s logo or security design, which can be tiled or stretched across id cards.
- – has built-in Holokote security technology and the option to customize the watermark for your company’s logo or security design, which can be tiled or stretched across id cards. This printer can have up to 10 unique Holokote designs.
- Magicard Enduro 3E– offers standard designs that can be toggled on and off through the printer’s driver.
*The Magicard Prima4 printer does not offer Holokote security technology.
Security Features for ID Card Holograms
It’s important to choose a composite card when opting for custom laminate because t a PVC card can’t stand up to the high temperatures of the lamination because polyester absorbs more heat.
What You Need to Know About ID Card Holograms
A true hologram like the ones featured on major credit cards such as Visa and Mastercard is produced by laser technology. This method of hologram technology can run several thousands of dollars and isn’t worth it unless your organization plans on producing a minimum of 100,000 cards.
However, while a laser cut, custom hologram might not be right or cost-effective for your organization, there are a several security features and hologram-like id card security features to choose from.
If you’re looking for a cost-effective holographic id card solution, then you may want to take your logo (it can be virtually any shape or symbol ) and have your logo ‘pressed’ into one of the many holographic patterns available that can include dots, concentric circles, diamonds and other designs, which make it virtually impossible for counterfeiters to reproduce.
How it works…
Keep in mind that the holographic foil pattern is pre-existing, and that you do not create a new, custom pattern. With this hologram id card printing process, the heated die head hits the holographic foil and transfers your logo (or symbol) to it.
For example, let’s say that your company logo is a globe and that the holographic foil you choose has concentric circles. With this hologram printing method, your star logo will feature a holographic pattern of concentric circles within the star’s outline or area, if filled.
Split-fountain/Rainbow Printing
Split-fountain or rainbow printing is a printing process that places dividers between colors of the printing press. It is a security features that prints a color spectrum across hologram id cards. For instance, colors will go from red-to-blue-to-red across the card, and where the colors meet it will appear purplish. This security feature makes it very difficult for counterfeiters to reproduce due the the high-cost of specialized equipment required for the process. Generally, the setup alone for rainbow printing starts at $4,000.
Color-shifting Ink
Color-shifting ink produces an effect that changes the colors based on how you hold or move your hologram id card. A great example of this technology is U.S. currency in dominations greater than $20 dollars. Passports also feature this technology, but certain colors are not available because they are used for governmental and ultra-high security purposes.
The screen charge for this process is about $250-$3000 for a minimum or a 10,000 cards. This process comes to less than 25 cents per card.
Guilloche Patterns
A guilloche pattern is a technique in which a precise, intricate and repetitive pattern is printed into an underlying id card. In security printing guilloche patterns go by geometric lathe and cycloidal engine techniques. The precision required to reproduce an exact guilloche pattern is extremely difficult to imitate and cost-prohibitive for counterfeiters.
Invisible Ink
Another security feature for your organization’s hologram id cards is invisible ink. Invisible ink requires a blacklight to be seen. Some of the color options are a neon yellow-green, blue and red. Red is the most expensive invisible ink color option because it requires multiple dyes to create the special pigment. Fore yellow-green and blue invisible ink printing on 10,000 card, the cost is about 10 cents per card. For red invisible ink, the cost is doubled at about 20 cents per card.
Also, the larger the area featuring invisible ink, the more expensive it will be to produce.
Hot stamping & hologram options without using an ID card laminator
Hot stamping is a security printing technique in which metallic foils are transferred to plastic hologram id cards or important documents. However, because the foils are transferred at very high temperatures, a composite card must be used to withstand the heat of the process.
One of the downsides of cost-effective hot stamping is that fine details such as the fine line commonly found on county or state seals are sacrificed. A good option is to go with a clear hologram and add your organization’s personalized information over it, which still makes the hard difficult to emulate because the foils that come in clear, gold and silver feature specific patterns.
Anti-copying/scanning Marks
Anti-copy security printing makes it difficult for counterfeiters to reproduce hologram id cards and other security documents. Anti-copy technology adds a hidden micro-text print to a hologram id card or security document. The area requires a magnifying lens or special Android phone app (iPhone app not available at this time) to decipher the hidden words.
U.S currency bills that are larger than $20 feature anti-copy technology and make it virtually impossible for people who do not have sophisticated training, machinery and technology to easily counterfeit currency.
When to Use a Hologram ID Card Printer
When a hologram is under a laminate nothing can be printed on the card. However, a clear laminate and a hologram ID card printer allows you to add personalization. The downside of a hologram embedded under a clear laminate is that it loses some of its sheen and sparkle. Certain foils work better than others under a laminate, but because the heat and pressure are so high during the lamination process, some metallic foils lose their iridescence.
When a hologram is on top of the plastic, it should not be printed over. The dye sublimation process over the top of the hologram can ruin a print head. However, the other areas of a hologram id card can be personalized.
Hologram id card printers are great options for companies who need to have variable information printed. Most holographic id card printers don’t have the capabilities to add high-end security features offered by sophisticated printing presses and laminators that run in the several hundred thousands of dollars. However, a holographic card printer gives your business to add personalization at a cost-effective price that can evolve with your organization’s needs.
Easy Badges has free consultations and quotes. Call us at 855-436-0527 or email sales@easybadges.com
Video Transcription:
Hi guys, it’s Matt with Easy Badges with another ID card printer review. Today we are going to review the Magicard Helix ID card printer.
I’m really excited for the Magicard Helix card printer review because the Helix is truly unique and I believe its obvious that its the future of card printing. What makes it truly unique is the LCD screen. While lots of card printers have LCD screens, but they are limited on what information they give you and how they show it.
We’ll start at top here. You can see exactly how you are connected to the printer. Right now in this case, the USB cable is lit up. It tells you the temperature. If you are at the right temperature in order to start printing. It tells you the yield that is left on the ribbons and what type of ribbon you have. So in this case I have a YMCKS ribbon loaded, its has 98 percent left. Now down here is what you’ll really like and will save your company a lot of time. You can print sample cards very easily. Choose from 4 different options. You can see your system information, some, change some basic settings right from the LCD screen of the printer as well. And here is the screen that will show you exactly how to do everything. Including loading new ribbons and film into the Helix printer. So its very useful in case there’s multiple people using the printer and they’re not familiar with it. It really saves a lot of time. Also how to reorder consumables. This is great if you are reselling it or just helping your employees quickly find support and reorder information. You can also change your watermark designs. You can cycle through the available different designs and we will talk more about Holokote later on. And the last option on the LCD screen shows you how to clean your printer. There are two options, how to clean the print head and how to clean the main printer. If the printer is too warm, it will actually give you a warning so it will prevent damage from you cleaning it while its still warm.
Another unique feature of the Magicard Helix is the ribbon capacities. Both the ribbon and the retransfer film are good for 1,000 cards. So that’s twice as much the popular Fargo HDP5000 printer on the ribbon and a little less on the retransfer film, but its also nice that they match. So with those high capacity yields, it really speeds up the printing process. Even though the printer might not be faster, that time it takes to load ribbons and swap out the jobs and stop print commands, this can really save some time. They load pretty uniquely as well. You can see these split apart and they are color coded so you don’t mess them up. You see the blue indicator here matches with the blue so you know the retransfer film goes over there and the ribbon goes over here. You can see that the ribbons easily slide into their cartridges.
The Helix has a high capacity input and output hopper of both 200 PVC cards.
Holokote is a great alternative to holographic laminates. Holographic laminates on traditional laminators can be very expensive and usually there is a 50 roll minimum as well as an origination fee. But Holokote prints a watermark into your existing overlay panel or in this case, retransfer film so there is no additional cost per card. The Helix comes is with 10 generic Holokote designs and you can also have a custom produced for a small fee.
The Helix is a retransfer printer which means the image is printed onto a retransfer film and then laid down onto the PVC card. The other common printing technology that is used by card printers is called direct-to-card. The first benefit being that is can go truly edge-to-edge and actually wrap around the edges of the card. While the direct-to-card printer is going to leave a small edge around the entire card. The other advantage of a retransfer printer is you can get much more vibrant colors and you get less ribbon tears by the ribbon sticking onto the card.
The Helix has a 3 year UltraCover Plus warranty which means if anything happens within 3 years of purchase and it needs to come in for repair, we overnight a loaner at no charge. Compared to the popular Fargo HDP5000, that’s 2 extra years of hot-swap warranty.
Thanks for watching guys. I hope you enjoyed the review of the Magicard Helix. And I hope you join me again for another ID card printer review.
Yesterday HID announced the launch of its all-in-one ID card printing and lamination direct-to-card printer, the Fargo DTC5500LMX, and its new high definition card printer, the Fargo HDP5600 – both of which comprise HID’s new Professional Select Series of printers.
The Fargo DTC5500LMX provides premium printing and delivers the quickest, most cost-efficient wasteless lamination solution on the market today. The DTC5500LMX is the latest release in the successful line of FARGO® Direct-to-Card (DTC®) printer/encoders, and the first to utilize HID Global’s iON™ technology which powers the fastest and most energy efficient lamination hardware available.
HID Global’s DTC5500LMX all-in-one printing and lamination solution delivers on the promise of reliable, high-volume production at an ultra-low cost-per-card. This enables cost-conscious organizations to routinely issue secure, durable cards in high volumes without sacrificing quality. And as the most energy efficient printing and lamination system available today, the DTC5500LMX is the first printer on the market to be GreenCircle® Certified.
Additionally, the DTC5500LMX system also uses HID Global’s new wasteless PolyGuard™ LMX overlaminates, providing the highest level of card protection while reducing consumable costs by up to 50%. The new consumable design will drive savings in high-volume printing environments, making it the ideal solution for higher education, large corporations, healthcare facilities and government agencies.
HID Global’s new Fargo HDP5600 features an affordable, high resolution 600 dpi printing option for superior text and image quality. Based on HID Global’s industry leading, 5th generation HDP technology, it is ideal for government agencies, universities, corporations and healthcare facilities who need re-transfer printing technology to routinely issue high definition ID cards.
Not only are colors more brilliant and images sharper, but the high quality, 600 dpi resin printing capabilities of the HDP5600 give the ability to precisely print small text and crisply defined barcodes like never before. The HDP5600 also includes a built-in Workbench™ diagnostic utility and Color Assist™ tool to help better match spot colors on company logos and service marks. Leveraging the 600 dpi option, the printer can even accurately reproduce complex characters, such as Kanji, Arabic and Cyrillic.
Key benefits of both printers are:
DTC5500LMX Printer/Encoder/Laminator
- Lower Cost Per Card. PolyGuard™ LMX wasteless laminates are manufactured with 1000 patches per roll – enabling lower cost per patch as well as minimizing consumable re-filling.
- Ease of Encoding. Wide array of contact, contactless and magnetic encoders available for seamless in-line encoding of smart card credentials.
- Save Time, Save Energy. HID Global’s iON™ technology brings the laminator to optimal operating temperature in under 45 seconds, as compared to the three-plus minutes required by competitive systems. This is up to an 80% saving in time as well as reducing energy consumption.
- Rugged Enclosure. Robust housing ensures continuous production of quality ID badges and smartcards – even in the harshest printing conditions, such as arid or dusty environments – protecting your investment long into the future.
- Dual-side Lamination Standard. Unlike other printer / laminators available on the market today, dual-side lamination with one material comes standard for users that may want a full clear patch on one or both sides, for example. A two-material option is also available for cards requiring unique laminates on each side – such as with a custom holographic patch on the front side of a card – with a half patch protecting the back side that leaves a magstripe unencumbered for use.
- Built in Security. Optional locking hoppers and consumable doors provide maximum security for printing of highly-secure IDs.
HDP5600 Printer/Encoder
- High Resolution Printing. The HDP5600 features a high resolution 600 dpi option for printing vibrant images, crisp barcodes and small, complex characters. A standard 300 dpi model is also available.
- Competitive Feature Set. The HDP5600 offers an array of differentiators not available with other HDP printers on the market:
-
- 600 dpi availability for both single-side and dual-side printing
- Half-panel ribbons (for a lower cost-per-card option)
- High Durable HDP Film
- Optional dual input hopper capability
- Backward-Compatible Ribbons and HDP Films. To ensure a smooth transition, the new HDP5600 ribbons and HDP films are backward compatible to the HDP5000. More information is available within the HDP5600 Launch Kit.
- Enhanced Memory. Provides all the same features, functions and options currently available for the HDP5000 but with added 64 MB memory, allowing for increased resolution without sacrificing print throughput speeds.
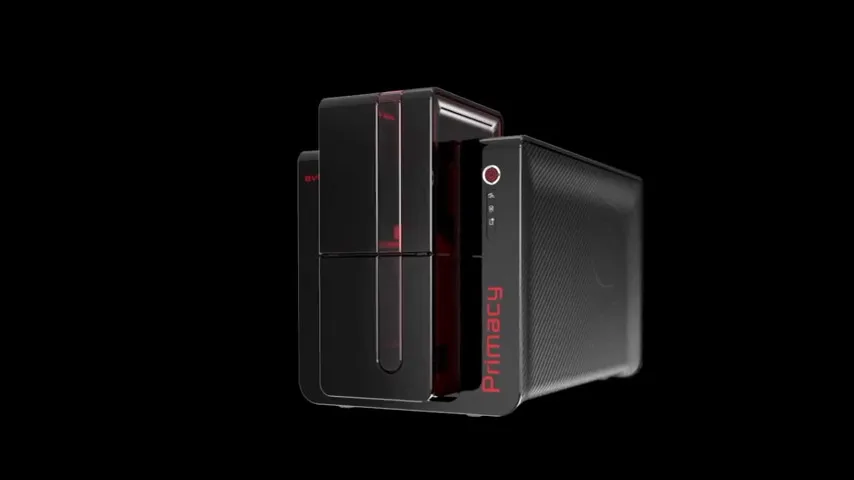
To celebrate its 15th anniversary, Evolis launched a limited edition black version of the Primacy ID card printer. (PN PM1H0000RD-BLK). The new edition will feature a black and red cover with a carbon effect on its sides giving the card printer an industrial and professional design. The black Primacy printer comes standard with dual sided printing and all of the supplies to get your company printing ID’s in no time. A free dual sided YMCKOK ribbon, CardPresso software, 100 PVC cards, and a cleaning kit are included at no extra charge.
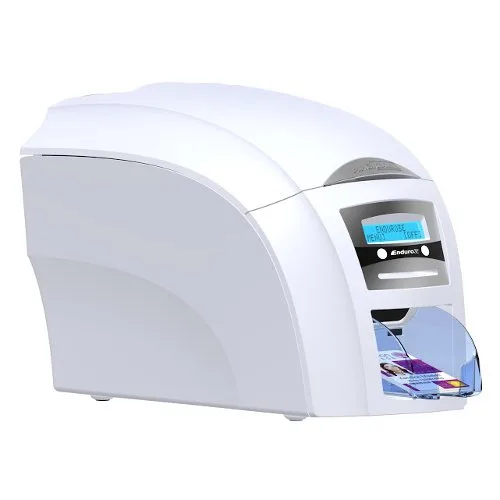
Magicard is adding some more bang for the buck into their mid-level card printer, the Enduro. The new version, the Magicard Enduro 3 card printer, is the same feature-packed card printer, but with added standard Ethernet connectivity (instead of USB only) and an upgraded 3 year depot from the standard 2 year depot. The Magicard Enduro 3 will still be the same price as the Enduro+ making it even more competitive among the mid-level card printer solutions. The Enduro 3 will begin shipping next month and slowly phase out stock of the Enduro+. Both models offer dual sided field upgradability making it one of the most flexible ID card printer solutions available.
Is the Enduro 3 the right Magicard printer for you? This is how the Enduro 3 stacks up against the other card printers in the Magicard line.
|
|||||||||||
|---|---|---|---|---|---|---|---|---|---|---|---|
| Rio Pro | 150+ | 100 / 70 | 3 year UltraCoverPlus | Custom and standard | Windows / Mac OS X | ||||||
| Enduro 3 | 100+ | 100 / 30 | 3 year depot | Standard | Windows / Mac OS X | ||||||
| Pronto | 1 card per 35s | Hand-fed | 2 year limited | Standard | Windows / Mac OS X | ||||||
![]()
With prices for entry level ID printer systems starting at $800.00, ID card printers can be outside of some companies budgets. If that is the case, creating ID cards online and having them shipped to you is a great option. Easy Badges has partnered with www.photo-badge.com to offer that service for its customers. It is easy to create a single ID badge or to customize multiple photo ID cards all at once from their online portal and it only takes a matter of minutes. Their personalized ID creation system utilizes a web-based software system that specializes in creating customized designs online. ID’s are typically mailed same or next day.
Photo-badge.com is backed by Smart Sign, America’s top online sign retailer. So while you are at it, you can safely and securely identify the rest of your facility with emergency, evacuation, notice, sidewalk, and number of possibilities with custom sign options.


What’s the best ID card printer you ask? Well I have a question for you- what’s the best cell phone on the market? Most of us have had this debate with our friends or family at some point. Personally I like my Android Galaxy S3. I haven’t made the leap to the newer version because I think its too big in my pocket. But my girlfriend pretty much NEEDS the S5 Active so she doesn’t break her phone daily. (She actually did manage to break it once by dropping it off a two story balcony. True story.) And maybe you like your iPhone. Point being, there really isn’t a one-fits-all pick for cell phones or card printers.
There are lot of features that are right for some companies and not a great fit for others. Some need speed and some need lamination. The best way is to always speak or email with a member of our sales team and they can usually narrow down your options in only a few minutes. But for those who want some guidance on where to start, I am going to do my best to recommend the best ID card printers in a straight to the point way. I am going to select 3 common ID printer categories and choose only one printer as the “best” for each category. Here goes nothing.
Best Entry Level ID Card Printer
Winner: Magicard Pronto
Why is it the best ID card printer?
The Magicard Pronto is the 2nd least expensive printer that we sell, but it doesn’t come to any expense of quality. It has a hand-fed design that eliminated some manufacturing costs that consumers can reap the benefits of. The Pronto also features the patented Holokote feature for added security without any extra cost. If you are printing less than 1,000 cards a year and typically issue only a handful of cards at a time, this may be the ID card printer for you.
Best High-End ID Card Printer
Winner: Magicard Helix
Why is it the best ID card printer?
Yes Magicard wins 2 out of 3 categories, but deservingly so. This printer is only available for preorder right now, but still makes the list which speaks to its quality. Check out the video below and you will see why. Our Youtube channel may die thanks to that color LCD display that communicates errors with illustrations on fixing the issue. And to put the ribbon yield in perspective, 1,000 prints is twice the size of the popular HDP5000 retransfer printer. No one likes changing ribbons out and we sending printing jobs. We saw the Helix at the ISC tradeshow earlier this year and were very impressed on how many new features there actually are. What they hint at in the video, but dont come out and say is that a lot of the high end retransfer card printers today are just renamed OEM versions of the same technology. There isn’t much differentiating between them all. I am looking forward to the Helix’s shipping launch later this year to get a little more hands-on that what I could at the tradeshow. We will update this posting as more info becomes available but makes sure to make your way to the Magicard Helix page for the latest info.
Best Large Format or Oversized ID Card Printer
Winner: SwiftColor SCC4000D
Why is it the best ID card printer?
It’s a common problem I have tried to solve for many customers over the years. You need to print oversized (larger than standard CR8030 credit card size) cards on demand for an event. There have been very little truly flexible solutions over the years, but the SwiftColor printer has answered a lot of people’s problems. By far it is the most flexible large format card printer and can print anywhere from a standard CR80 card to an enveloped sized card. Other solutions only offer customization with the credit card sized area or just a little extra length, but not width. Many major sport organizations have switched to the SwiftColor including professional and collegiate sporting teams and championship series. I won’t list them here to avoid a lawsuit since I can’t remember the confidentiality agreements for those. :) The SwiftColor SCC4000D can handle any ID that needs to be scene from afar for event credentials, law enforcement ID’s, and many other applications. See our Oversized ID card printer page for other large pvc card solutions.

I frequently get asked, “What’s a good, cheap id card printer? I personally don’t like the word cheap, I prefer inexpensive. So here are a couple of quality, inexpensive card printers great for printing only a handful of badges or all the way up to 1,000 cards per year.
Magicard Pronto
Why is it cheap?
The Magicard Pronto has a hand-fed design. That means one card at a time. Because Magicard didn’t spend money investing in the card hopper and card path, the Pronto ID card printer ends up coming in at a relatively inexpensive price. The Pronto’s print quality is everything but cheap and is just as good as any other dye-sub printer on the market. And you have the Holokote feature which is great for added security at no extra cost per card. (Learn more about Holokote on the Pronto product page.) And pro-tip, though its single sided by nature, you can send a double sided print job to it. The Pronto will eject the card out after printing the first side, you can manually flip it, and it will print the second side without having to send another print job to it.
Who should buy the Magicard Pronto?
The printer is great for lobby environments because of its small size. If you have only the occasional visitor or new employee, this is the perfect ID printer since a large hopper isn’t needed anyway. So why pay for it?
Who shouldn’t buy the Magicard Pronto?
If you print many ID’s all at once, its probably not the best printer for you since you manually have to put each ID card into the Pronto for printing. No one likes long lines.
How cheap is it?
$850.00 for just the Pronto printer or you can browse pricing for a complete Pronto ID card system
Evolis Badgy200
Why is it cheap?
The Evolis Badgy200 ID card printer is a very entry level printer. While the printer has a decent print quality, I noticed that it leaves a larger than average boarder. The average print time is a tad slower than average too at 38 seconds per full color card side.
Who should buy the Evolis Badgy200?
Those looking for absolutely the lowest priced ID card printer. The Badgy200 comes with entry level software, ribbon, and 100 PVC cards which is a rarity in the industry. This ID printer is truly ready to go out-of-the-box.
Who shouldn’t buy the Evolis Badgy200?
The Evolis Badgy200 only has a 1 year warranty and probably isn’t the best choice for anyone printing for than 100 ID badges a year. And unlike the other entry level printers, absolutely no options can be added. That means if you are using magnetic stripe cards or need to network this printer so multiple computers can print to it, this is not the ID printer for you.
How cheap is it?
Complete bundle of the Badgy200 printer, ribbon, 100 cards, and entry level software for $849.00
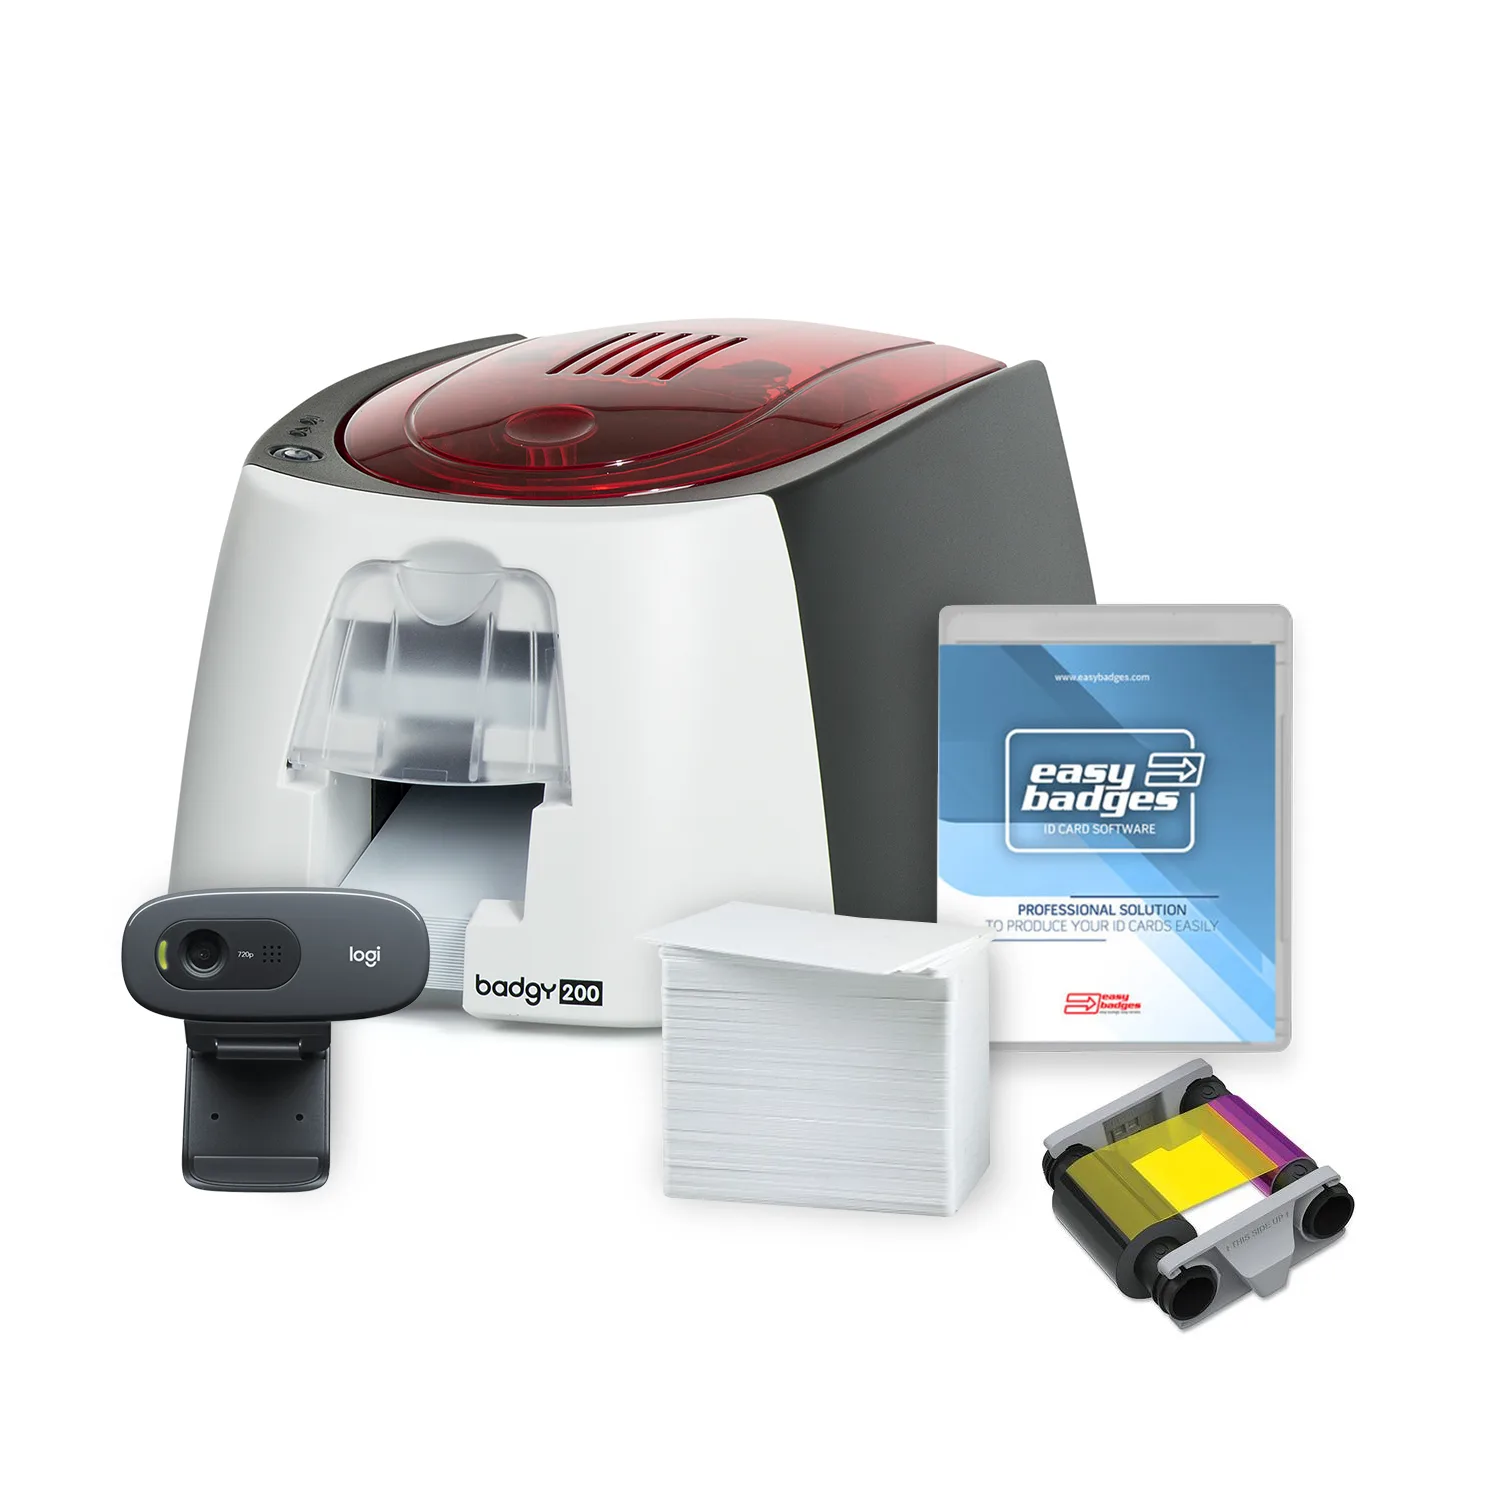
SKU: B22U0000RS
Evolis Badgy200 ID
A true out-of-the-box entry level ID card printer system.
$ 849.00 – $ 889.00
IDP Smart 30
Why is it cheap?
The IDP Smart 30 has had a remarkable track record outside of the US and is finally starting to pick up sales in the US after boosting their US home office with added support and an experienced sales staff. However, prices seem to have stayed the same since leaving Korea making this one of the best ID card printer values. The IDP 30 and 50 are some of my favorite ID printers, not just inexpensive ones.
Who should buy the Smart 30?
Anyone looking for a great value. The Smart 30 many options avilable that are typically only available on the higher tiers of professional card printers. Its fast, has a large input hopper of 80 cards, is extremely reliable, and has a 3 year limited warranty with 3 year loaner program. The printer can realistically print 5,000+ cards per year without a sweat.
Who shouldn’t buy the Smart 30?
Well its cant laminate, but if you need to do that, this post isn’t for you.
How cheap is it?
The single sided base model starts at $1,109.00.
There you have it, the best “cheap” ID card printers available today. You may also contact us about used ID card printers that we may have available at sales@easybadges.com
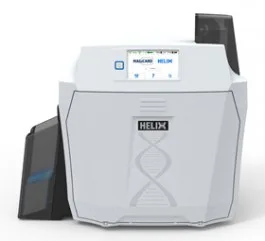
UPDATE- Magicard Helix sneak peak video and brochure available here
I was fortunate enough this spring to get an early look at the Magicard Helix card printer at the ISC West tradeshow. Many of the top dealers, including myself, were very impressed with the new retransfer card printer. Many actually came back into our booth and buzzing about it before I made my way over to take a look. While many of the current retransfer models out there are just rebranded OEM models, the Magicard Helix printer is a brand new design manufactured by Magicard. The Helix doesn’t fall short on new features either even though I only saw a handful of them. The Helix will feature field-upgradababilty to dual side (a rarity among retranfer printers), UV security features in the overlaminate, and the first ever visual security features within the overlay panel for a retranfer printer (commonly known as HoloKote in the DTC Magicard models.) I was told that the printer will likely launch with a 3 year warranty with loaner service as well. Will it become my go-to retransfer printer? I can’t wait to get my hands on it to find out. It is tentatively set to start shipping in the late half of the year.
| Matt- Easy Badges Co-Founder and ID Guru |
|---|
1.) Open up the cover.
2.) Pull back on the blue latch hooks to release the printhead arm and pull the printhead arm to its fully open position.
3.) To load the ribbon: Place the supply end of the print ribbon in between the two hubs. The print ribbon comes wound on a gray spool with a green ring around one side. Match the green ring on the Ribbon Spool to the green hub inside the printer.
4.) Now insert the take-up end of the ribbon by depressing the spring hub and lowering it into place. Make certain the Ribbon is fed from beneath the roll.
5.) Lower the print arm assembly by gently pressing down with your thumb until the printhead arm latches into place.
Now its time to replace the card cleaning roller that came with your ribbon.
Remove the old card cleaning roller contained in the blue cartridge towards the back of the printer. Remove the white cover sheet before loading the card cleaning cartridge. Slide the blue cartridge down and back into place. Close the printer cover and start printing.
If your Fargo DTC550 is experiencing ribbon jams, this is likely due to very dark colors in your ID card design. If you are using very intense colors, especially dark reds, the ribbon may be melting onto the card causing “ribbon wrinkle” or jams. Try reducing the intensity of the colors to see if that resolves the issues. If not, call our technical support team.
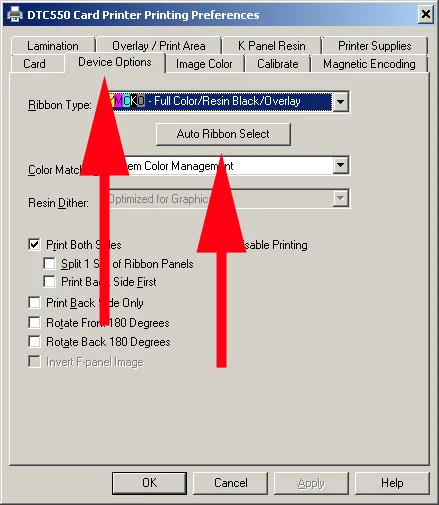
Troubleshooting a “Wrong Ribbon Error” for a Fargo DTC550
1.) Go to your printer driver.
2.) Select Device Options
3.) Select Auto Ribbon Select button. Printer will then auto-detect the ribbon you are using.
1.) Press the Menu button on the front the Fargo DTC550.
2.) Select “Print Test Image.”
3.) Choose “Gray Align Test” and a card will print.
 Sales :
 Sales :


 Your Cart